For development or testing purposes, SQL users often need to restore the same database on the same PC or server with a different name. In this tutorial, I am going to explain the detailed steps to restore the same database with different names in SQL Server.
We advise against attaching or restoring databases from unauthorized or untrusted sources for security reasons. These databases may contain malicious code that can alter the physical database structure or schema, run unwanted T-SQL code, or cause problems.
This tutorial will show you various ways to restore the same database with different names in SQL Server.
Method 1 - Using SQL Server Management Studio (SSMS)
Step 1
Open SQL Server Management Studio (SSMS) and connect to the SQL Server Instance.
Step 2
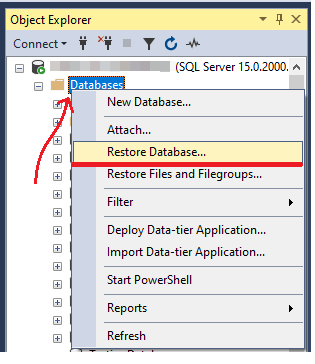
In Object Explorer, right-click Databases and select "Restore Database...".
Step 3
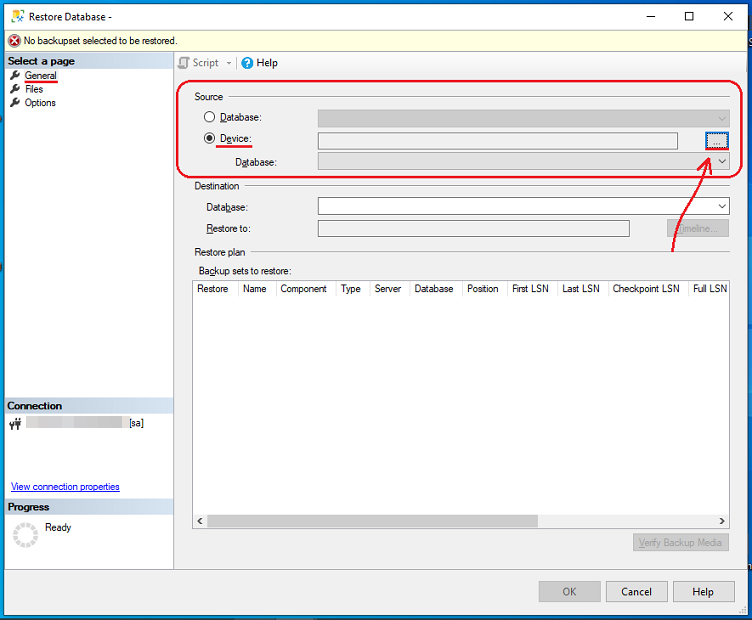
The Restore Database window will appear on the screen. On the General page, use the Source section to specify the source and location of the backup set to be restored. Now, select the Device option and click the Browse (...) button.
Step 3a
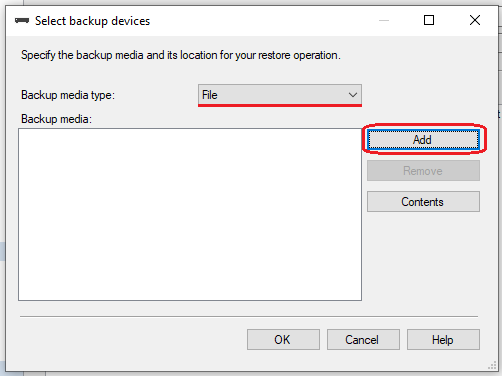
Select backup devices window will appear on the screen. Click the Add button to select one or more backup device(s) for the Backup media box.
Step 3b
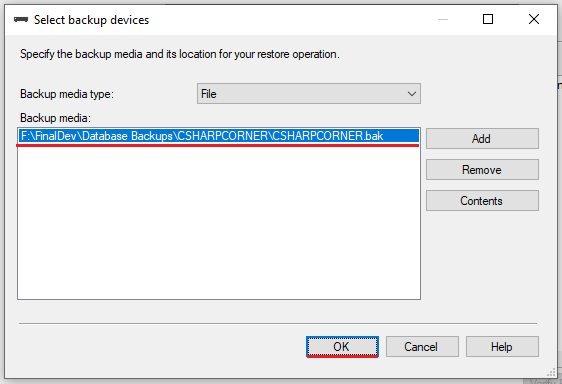
Locate and select the SQL database backup file(s) (.bak) that you want to restore, and click the OK button to proceed.

Step 3c
After adding the desired backup file to the Backup media list box, click on the OK button to proceed.
Step 4
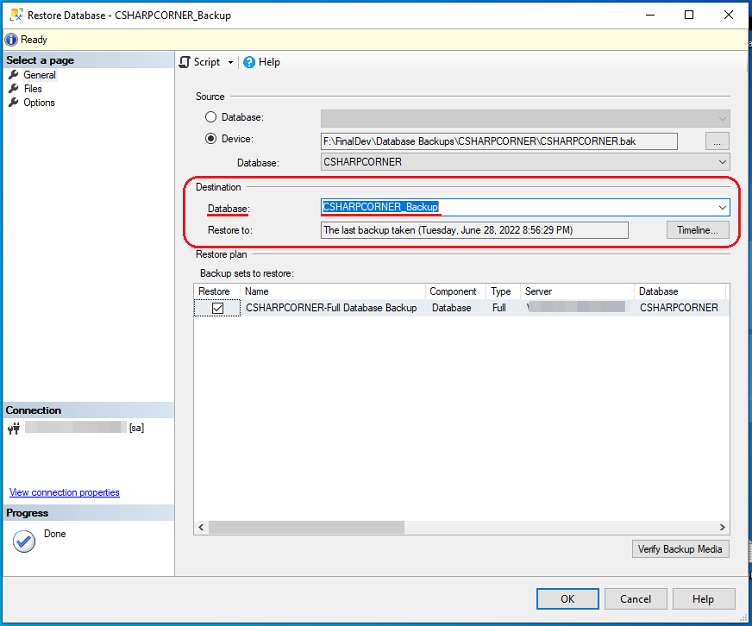
In the Destination section, the Databases box is automatically populated with the name of the database to be restored. Now, you need to rename the destination database, to do so enter the new name in the Database box. And, leave the default values as it is in the "Restore to" box and "Backup sets to restore" grid.
For example, here I have renamed the Destination Database to "CSHARPCORNER_Backup".
Step 5
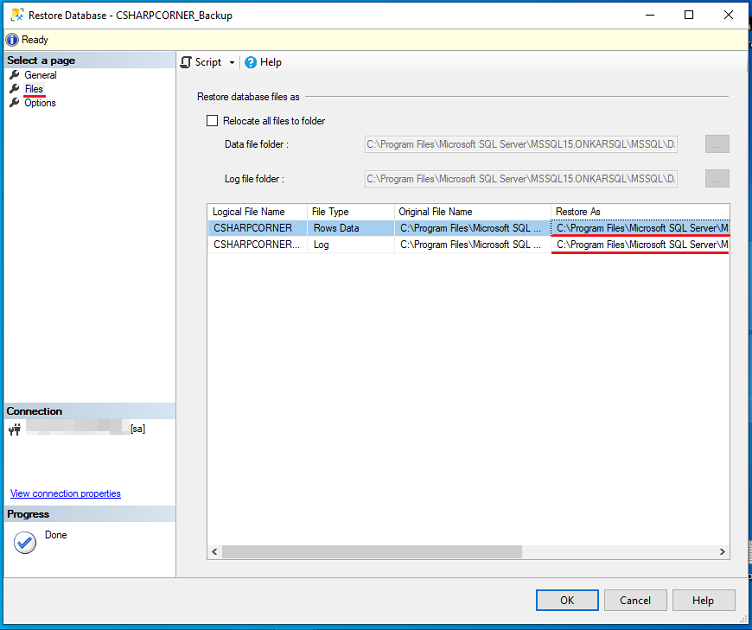
Going to the Files page, proceed with the steps to specify the new location or name of the database files (Data and Log files).
The file names in our case are "CSHARPCORNER_Backup.mdf" and "CSHARPCORNER_Backup_log.ldf," respectively.
Note:
- When you rename the destination database, SSMS itself renames both the data and log files to "Restore As". I remember that in earlier versions of SSMS you had to change manually the names of the files, otherwise, they would conflict with existing files.
- To prevent conflicts, avoid placing new database files in the same directory as the existing database. If necessary, modify the directory name. However, make sure the drive you are using has enough space.
Step 6
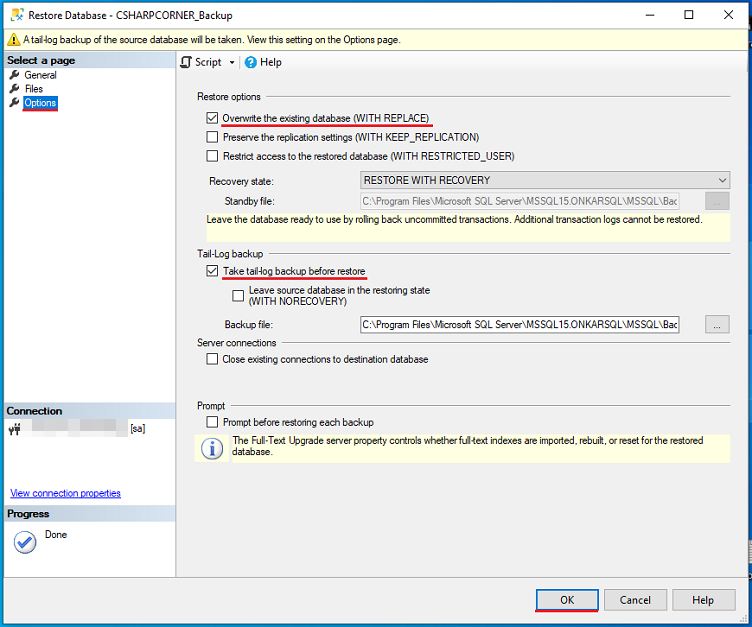
Proceeding with the steps again, go to the Options page. Here, you need to make sure that the following options are checked. And, click the OK button.
"Overwrite the existing database (WITH REPLACE)" under the Restore options section.
"Take tail-log backup before restore" under the Tail-log backup section. (optional)
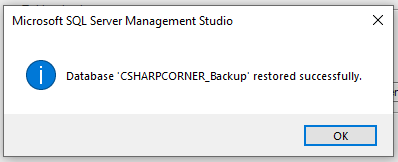
Congratulations! the "Database 'CSHARPCORNER_Backup' restored successfully" message shows that our backup database has been successfully restored.
Method 2 - Using Transact-SQL (T-SQL)
With the help of T-SQL, users can also restore the database with a different database name. Follow the below steps to proceed.
Step 1
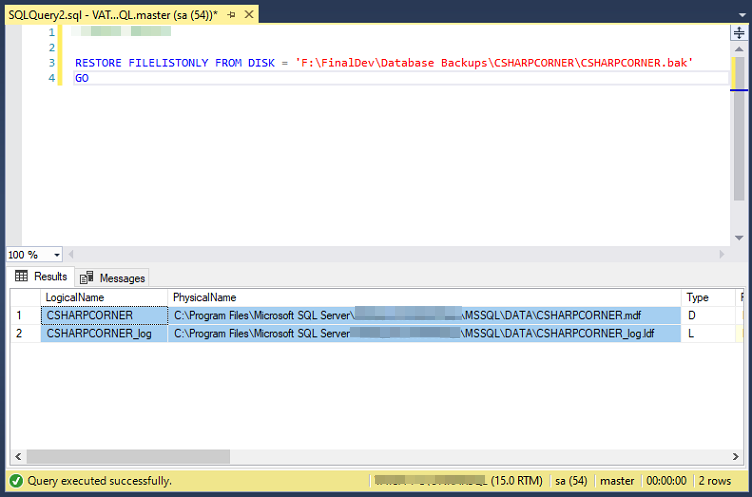
Optionally, determine the logical and physical names of the files in the backup set that contains the full database backup that you want to restore. This statement returns a list of the database and log files contained in the backup set. The basic syntax is as follows:
RESTORE FILELISTONLY FROM DISK = <Backup_file_location>
Step 2
To restore a full database backup, use the RESTORE DATABASE statement. Use the MOVE option to relocate each of the database files (.mdf & .ldf) and to avoid conflicts with existing files. Because data and log files are restored to their original locations by default. Use the following basic T-SQL syntax to restore the database to a new location and a new name.
RESTORE DATABASE [NEW_DATABASE_NAME]
FROM DISK = N'<BACKUP_FILE_PATH/BACKUP_FILE_NAME.BAK>'
[ WITH
{
[ **RECOVERY** | NORECOVERY ]
[ , ] [ FILE = { *backup_set_file_number* | @*backup_set_file_number* } ]
[ , ] MOVE '*Logical_File_Name_In_Backup*' TO '*Operating_System_File_Name*' [ ,...*n* ]
}
Example
Execute the following T-SQL queries to restore the database with the same name on the same PC or server. Follow the below steps to proceed.
Step 1
Determine the logical and physical names of the files in the backup set by executing the following query.
RESTORE FILELISTONLY FROM DISK = N'F:\FinalDev\Database Backups\CSHARPCORNER\CSHARPCORNER.bak'
Step 2
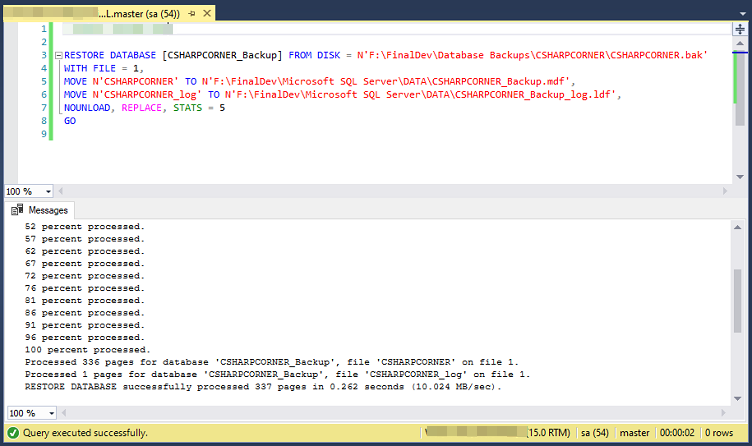
Once you have obtained the logical and physical names of the database files, execute the below query to restore the same database with a different name.
RESTORE DATABASE [CSHARPCORNER_Backup] FROM DISK = N'F:\FinalDev\Database Backups\CSHARPCORNER\CSHARPCORNER.bak'
WITH FILE = 1,
MOVE N'CSHARPCORNER' TO N'F:\FinalDev\Microsoft SQL Server\DATA\CSHARPCORNER_Backup.mdf',
MOVE N'CSHARPCORNER_log' TO N'F:\FinalDev\Microsoft SQL Server\DATA\CSHARPCORNER_Backup_log.ldf',
NOUNLOAD, REPLACE, STATS = 5
GO
Problems associated with restoring the database
Both methods of restoring the database with the new name are effective and efficient. However, these techniques are not without drawbacks, and you may encounter difficulties such as the following:
Invalid file format.
Invalid source file path.
Incorrect data and log file name.
Inconsistency errors in the database.
Insufficient disk space to restore the database.
Inadequate SQL permissions to run the T-SQL statement.
To restore an encrypted database, you must have the certificate or asymmetric key that was used to encrypt it. Otherwise, you cannot restore the database without a certificate or asymmetric key.
Note
Apart from these issues, incorrect implementation of a single step to restore a database can corrupt the database and result in potential data loss. Additionally, you may encounter the "SQL database restore failed, database in use" error message.
HostForLIFEASP.NET SQL Server 2019 Hosting
