XML acronym for eXtensible Markup Language. This markup language is much similar to HTML. It is designed to store and transport data. Moreover, the XML tag is not predefined, it is designed to be self-descriptive.
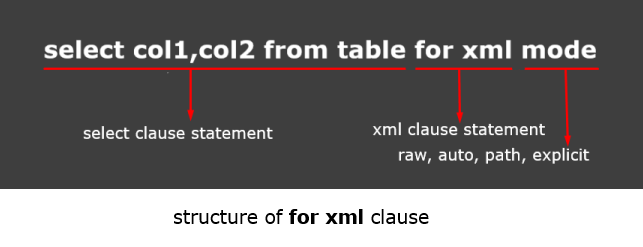
For XML Clause
For XML clause is used to convert SQL result set into XML format. It is a very much helpful clause when we need XML data from the SQL result set. The FOR XML clause can be used in top-level queries and in subqueries. The top-level FOR XML clause can be used only in the SELECT statement. In subqueries, FOR XML can be used in the INSERT, UPDATE, and DELETE statements.
There are four modes of For XML Clause. Like
Elaboration of Modes
Raw
Each row is turned into an XML node. That is called row by default, but you change the node name at any time by your own name. Every column will convert as an attribute.
select Id, Name, CatId from Product for xml raw
Now replace the default row node name with own custom name.
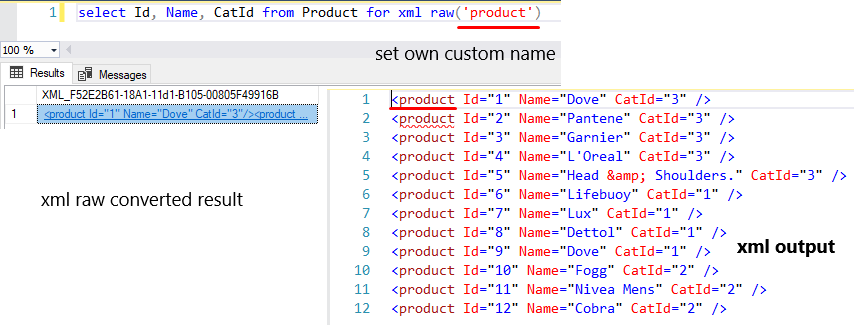
select Id, Name, CatId from Product for xml raw('product')
It is also possible to set a root element in this XML structure. Here is the same as before. The default root element name is root. But you can change the root element name.
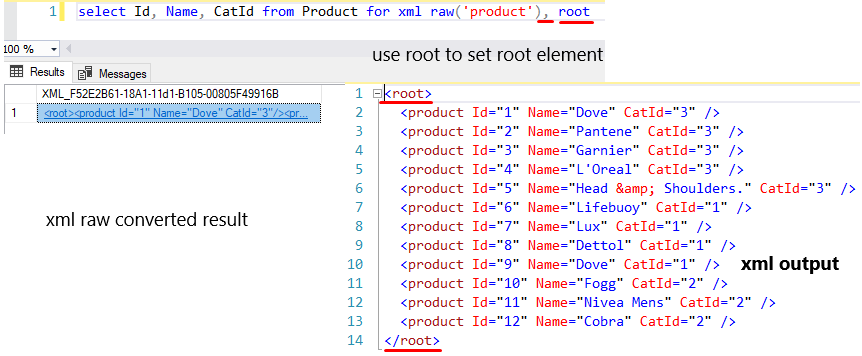
select Id, Name, CatId from Product for xml raw('product'), root
Moreover, you can also set elements instead of attribute.
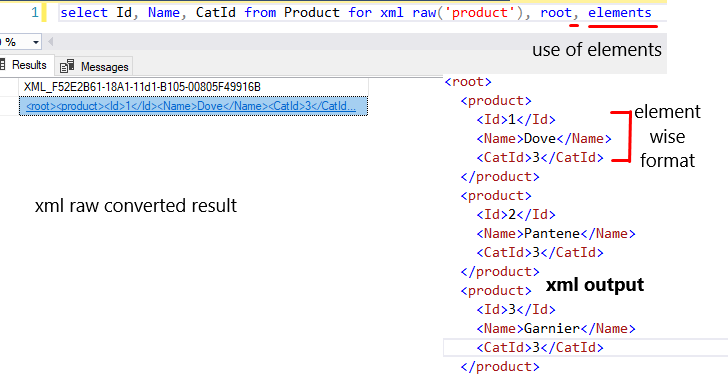
select Id, Name, CatId from Product for xml raw('product'), root, elements
Auto
Similar to raw mode, but here uses table name as default node name instead of row. Here everything is possible as in raw mode. Like the root, elements can be used.
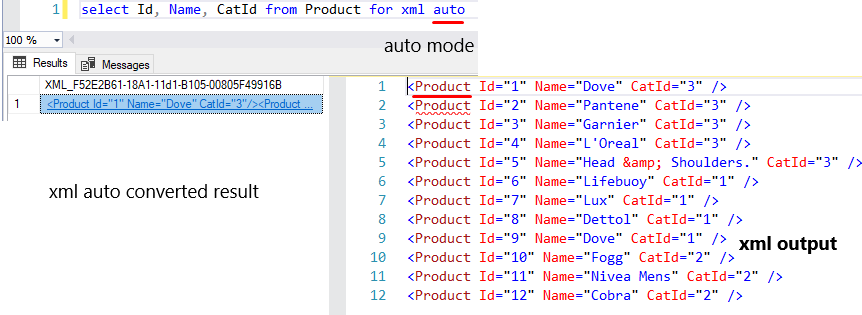
select Id, Name, CatId from Product for xml auto
But in this mode, you can’t set a custom node name instead of the default table name.

Use of root and elements in auto mode.
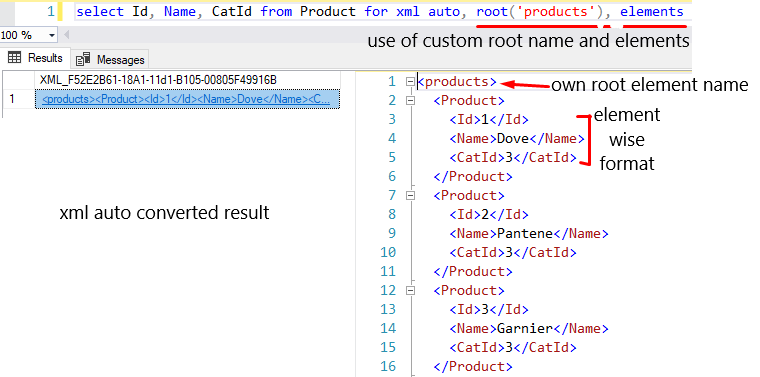
select Id, Name, CatId from Product for xml auto, root('products'), elements
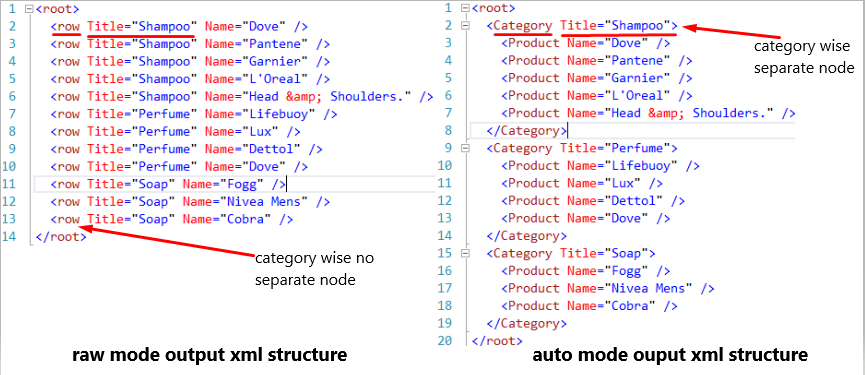
Difference between raw and auto mode
When you will retrieve data from multiple tables by joining then you will see the big difference between the two modes.
Raw mode query
select Category.Name as Title, Product.Name from Product
inner join Category on Product.CatId = Category.CatId
for xml raw, root
Auto mode query
select Category.Name as Title, Product.Name from Product
inner join Category on Product.CatId = Category.CatId
for xml auto, root
Path
This mode will convert each record as a parent element and every column as a nested element. There is no default attribute, but you can set custom attributes. In this mode, you can also use row, root, and elements. This mode is the best and better.
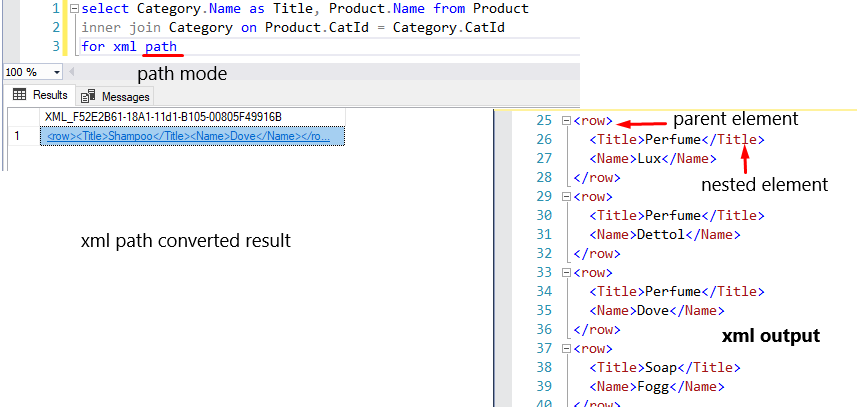
select Category.Name as Title, Product.Name from Product
inner join Category on Product.CatId = Category.CatId
for xml path
Use of custom parent path and root element in path mode.
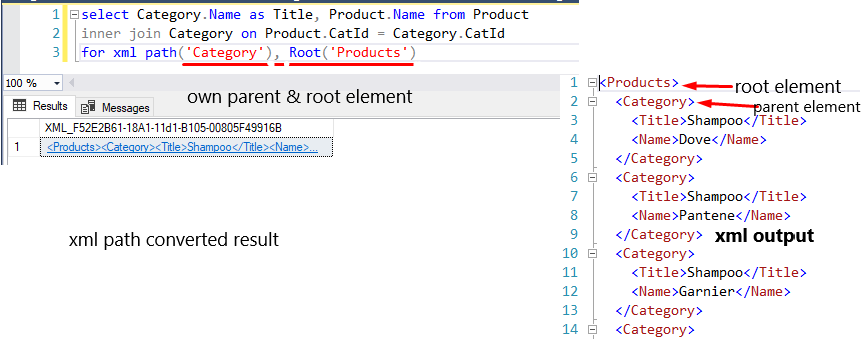
select Category.Name as Title, Product.Name from Product
inner join Category on Product.CatId = Category.CatId
for xml path('Category'), Root('Products')
You can set attributes in this path mode very easily. But keep in mind that to assign attribute must be use @sign with the column name alias.
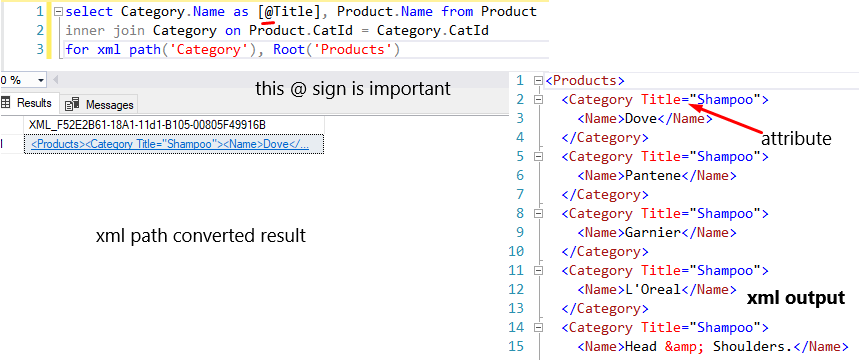
select Category.Name as [@Title], Product.Name from Product
inner join Category on Product.CatId = Category.CatId
for xml path('Category'), Root('Products')
Explicit
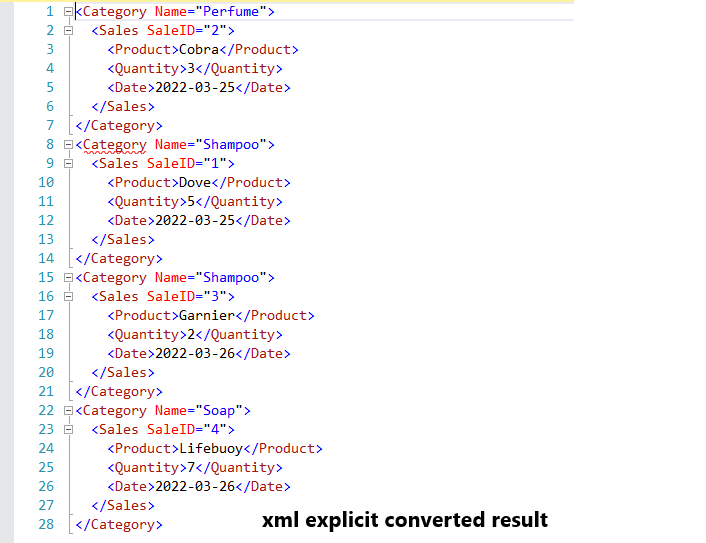
This mode is used to generate own custom XML structured format. So, you can choose it to generate own XML structure.
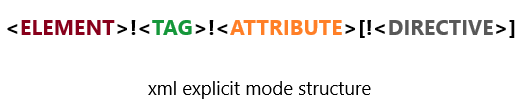
<ELEMENT>: The name of the element to which values will be assigned.
<TAG>: The tag number represents the level in hierarchy or depth.
<ATTRIBUTE>: The name of the attribute to which a particular column’s value will be assigned.
<DIRECTIVE>: This is optional and used to provide additional information for XML creation. We will look at one of its options "ELEMENT".
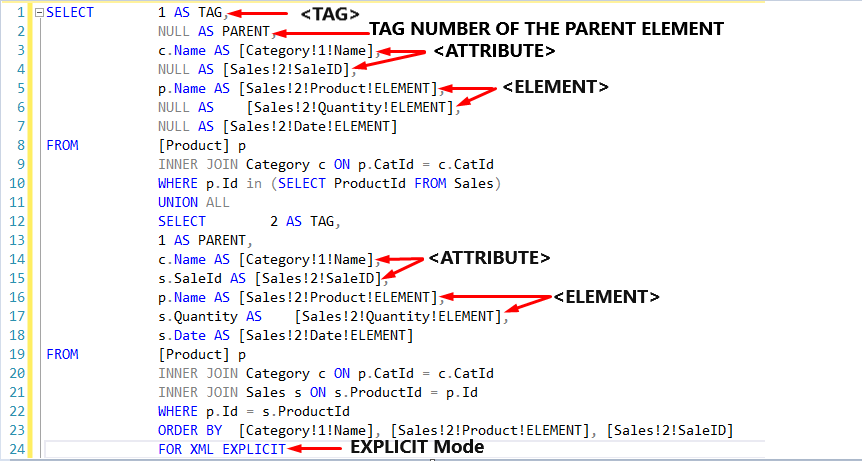
The first two columns are Tag and Parent and are Meta columns. These values determine the hierarchy. Moreover, this two-column name must be Tag and Parent. This name is required.
SELECT 1 AS TAG,
NULL AS PARENT,
c.Name AS [Category!1!Name],
NULL AS [Sales!2!SaleID],
p.Name AS [Sales!2!Product!ELEMENT],
NULL AS [Sales!2!Quantity!ELEMENT],
NULL AS [Sales!2!Date!ELEMENT]
FROM [Product] p
INNER JOIN Category c ON p.CatId = c.CatId
WHERE p.Id in (SELECT ProductId FROM Sales)
UNION ALL
SELECT 2 AS TAG,
1 AS PARENT,
c.Name AS [Category!1!Name],
s.SaleId AS [Sales!2!SaleID],
p.Name AS [Sales!2!Product!ELEMENT],
s.Quantity AS [Sales!2!Quantity!ELEMENT],
s.Date AS [Sales!2!Date!ELEMENT]
FROM [Product] p
INNER JOIN Category c ON p.CatId = c.CatId
INNER JOIN Sales s ON s.ProductId = p.Id
WHERE p.Id = s.ProductId
ORDER BY [Category!1!Name], [Sales!2!Product!ELEMENT], [Sales!2!SaleID]
FOR XML EXPLICIT
Hope this article would have helped you to understand about SQL XML clause. Here I have tried to explain very simply all terms of this clause. Happy coding and thanks for reading my article!
HostForLIFEASP.NET SQL Server 2021 Hosting
