In our earlier article, we had learned how to create a login in SQL Server with help of GUI as well as T-SQL script. Granting read, write, execute, create, etc. in SQL Server comes under a security context, and being a Database Administrator, it’s very important to make sure that a user must have sufficient permission to access the database and its objects once he/she gets a new login for the server.
The Database Administrator must ensure that no other anonymous user can access the database to perform any unauthorized activity.
By default, the SQL Server denies access to database objects after you create a login for a user. Therefore, if you want to access the database objects with your login, you must have sufficient permissions provided by your database administrator.
Before proceeding, below are the details we’ve provided for the demo:
Database: CSharpCornerDB
User: Peter
Connection Required: 2 (Admin Session, SQL Login Session)
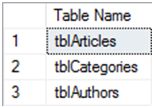
Currently, we’ve connected with Admin login and have three tables with some data in it.
You can find attached script to create database and objects used in this demo. If you want to grant permissions to any user, you must be a member of sysadmin, db_owner or the SA account. Let’s begin with the demo.
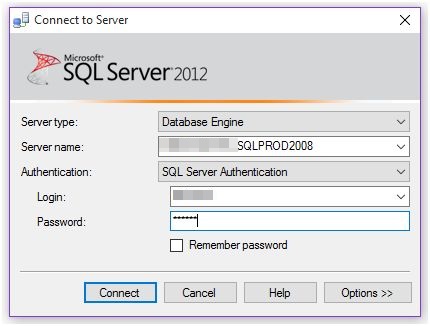
Connect to your server session with the SQL login as in the following:
After successful authentication, you’ll get connected to the server with the username as in the following:
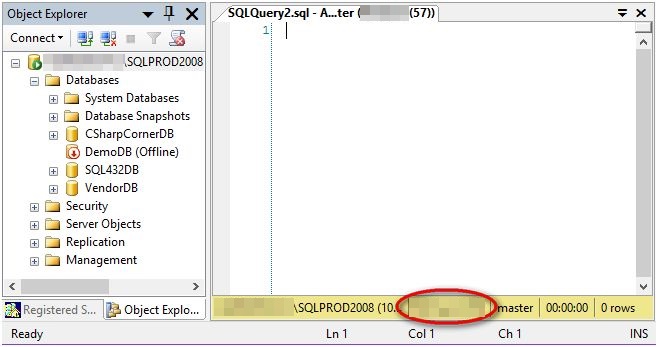
As we mapped our user to CSharpCornerDB database, we’ll connect to it. But if you try to connect to other database, you’ll end up with the following error message.
Msg 916, Level 14, State 1, Line 1
The server principal "MChand" is not able to access the database "SQL432DB" under the current security context.
Also if you try to expand other database node, SQL Server throws the following error message window. And the '+' sign disappears as shown below.

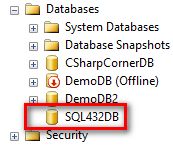
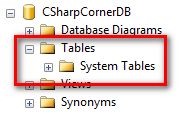
So, this simply means that the user can only connect to the database on which it is mapped. We’ll select our mapped database i.e. CSharpCornerDB. As we already know, we have three tables in our database, as mentioned earlier. But if you expand the Tables folder you won’t find any table in it. You’ll only get the following output:
Also, if you try to execute the following query to get data in tables, you’ll get the following error message.
SELECT * FROM tblArticles
SELECT * FROM tblCategories
SELECT * FROM tblAuthors
Error Message:
Msg 229, Level 14, State 5, Line 1
The SELECT permission was denied on the object 'tblArticles', database 'CSharpCornerDB', schema 'dbo'.
Msg 229, Level 14, State 5, Line 2
The SELECT permission was denied on the object 'tblCategories', database 'CSharpCornerDB', schema 'dbo'.
Msg 229, Level 14, State 5, Line 3
The SELECT permission was denied on the object 'tblAuthors', database 'CSharpCornerDB', schema 'dbo'.
This is nothing new but the default behavior of SQL Server to deny access on database objects after creating new login for user. If we want to access those objects, we require read permission for the user with which we’re connected.
To provide READ permission to the user on the database, connectthe server with your admin account or with Windows account and follow the below steps.
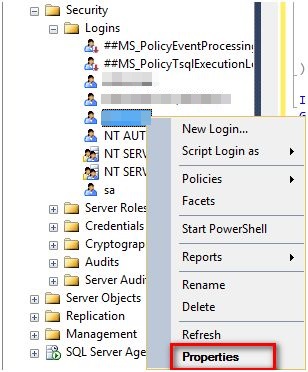
Expand Security - Logins, then Right Click on login and then click Properties.
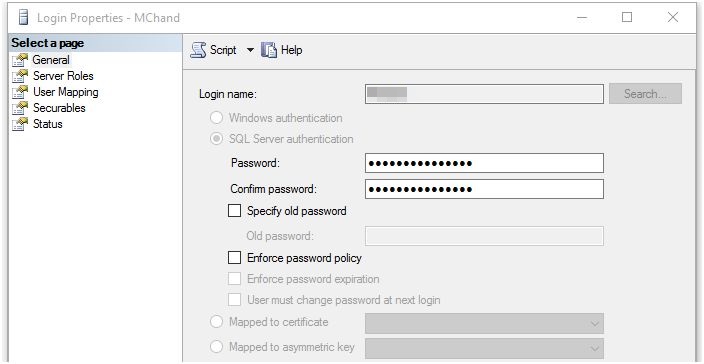
You’ll get Login Properties window as in the following screenshot:
Go to User Mapping tab and select the database on which you want to give permission and at bottom select db_datareader as shown below.
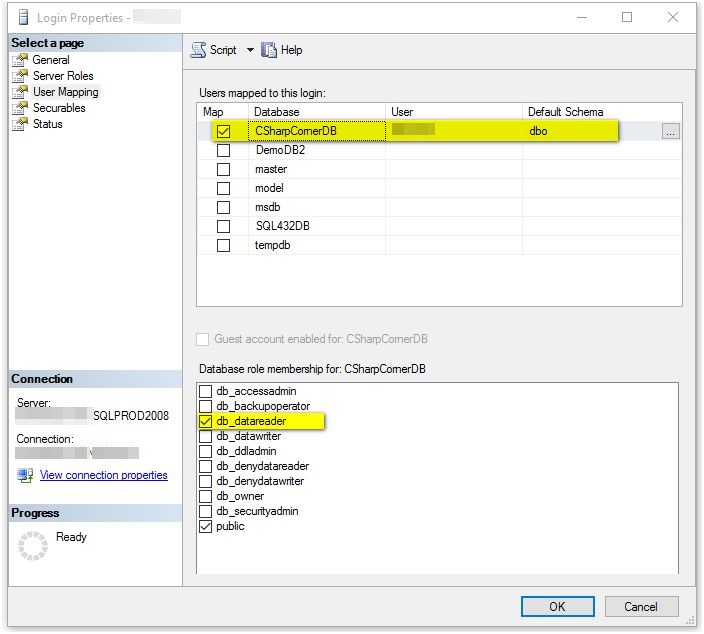
Click Ok and you’re done.
The following is the T-SQL for the same.
USE [CSharpCornerDB]
GO
EXEC sp_addrolemember N'db_datareader', N'Peter'
GO
Now go to the session on which you’re connected with Peter login and refresh the Tables folder. If you see all the tables are now visible and are listed below.
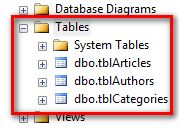
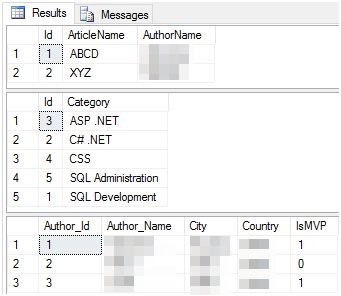
Now if you execute the following select query, you’ll be able to see all the data in the table.
USE CSharpCornerDB
GO
SELECT * FROM tblArticles
SELECT * FROM tblCategories
SELECT * FROM tblAuthors
Also, if you run SELECT command to get table details, you’ll get output for both.
Now let’s insert another record into table tblArticles.
USE CSharpCornerDB
GO
INSERT INTO tblArticles values('Strings in C#','Scott')
GO
If you execute the above query, you’ll encounter the following error message:
Msg 229, Level 14, State 5, Line 1
The INSERT permission was denied on the object 'tblArticles', database 'CSharpCornerDB', schema 'dbo'.
The error message simply states that INSERT permission is denied on the object. This means we don’t have permission to write any data in the database objects.
To give WRITE permission on database to the user, follow below steps.
Security - Logins, then double click on Login and you’ll get Login Properties window.
Go to User Mapping Tab and select the database on which you want to give permission.
Under ‘Database role membership for’ section, check ‘db_datawriter’ checkbox as shown below.
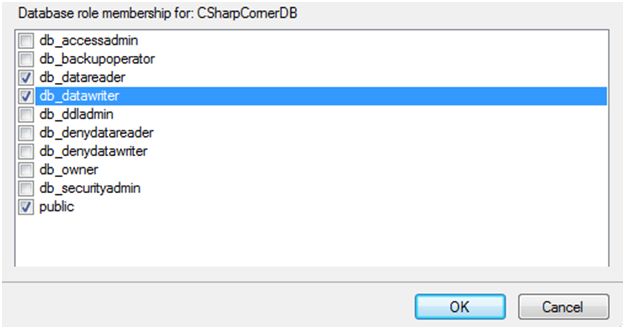
Click Ok and you’re done.
The following is the T-SQL script for the same.
USE [CSharpCornerDB]
GO
EXEC sp_addrolemember N'db_datawriter', N'Peter'
GO
Now if you execute INSERT command from Peter session, it’ll add the record without any error.
After getting WRITE permission, you can run INSERT, UPDATE and DELETE commands.
If you want to revert back the action you can execute the following query from admin session.
USE [CSharpCornerDB]
GO
EXEC sp_droprolemember N'db_datareader', N'Peter'
GO
USE [CSharpCornerDB]
GO
EXEC sp_droprolemember N'db_datawriter', N'Peter'
GO
Conclusion
So, this is an article based on SQL Security where we learned how to provide read/write permission for user to read and write data from/to SQL Server database. If you are new to SQL, please read What is SQL.
Hope this article helps you o understand how to provide read write permissions. There are also other permissions which you can try with database on your server. If you need any help in this, please let me know. I’ll try my best to solve those.
Please provide your valuable feedback and comments that will help me in providing a better article the next time. Till then keep learning and keep sharing.
HostForLIFEASP.NET SQL Server 2019 Hosting
