
March 23, 2021 07:26 by
 Peter
PeterEvery developer who has worked with SQL SERVER sooner or later has come across this problem, where he or she has to take a copy of the row/s before performing any DML operations, and the table in which it is copied is generally marked as ‘tablename_history’ or ‘tablename_backup’ and this is achieved by writing an insert query in a stored procedure or trigger whichever found appropriate.
Recently I stumbled upon a system function in the SQL SERVER called Change Data Capture (CDC in short), which does the above function(if enabled) asynchronously by default and is supported by all versions higher than SQL Server 2008.
Enabling Change Data Capture
To implement CDC we first need to enable CDC on a database, this is done by executing the stored procedure "sys.sp_cdc_enable_db" as given below.
-- To Enable CDC
USE [CDC_TEST]
GO
EXEC sys.sp_cdc_enable_db
GO
Now to enable CDC on the table, we need to do the stored procedure "sys.sp_cdc_enable_table" with its input parameters as given below
USE [CDC_TEST]
EXEC sys.sp_cdc_enable_table
@source_schema = 'dbo', -- Is the name of the schema to which the source table belongs.
@source_name = 'Customer', -- Is the name of the source table on which to enable change data capture
@role_name = NULL -- Is the name of the database role used to gate access to change data, we can mention null if we want all the users having access to the database to view the CDC data
Once the stored procedure executes successfully some table with schema "cdc" is generated under the System Tables folder.
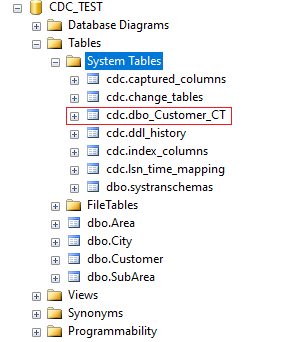
The tables include the following
cdc.captured_columns table that contains the list of captured columns
cdc.change_tables table that contains the list of tables that are enabled for capture
cdc.ddl_history table that records the history of all the DDL changes since capture data enabled
cdc.index_columns table that contains all the indexes that are associated with change table
cdc.lsn_time_mapping table that is used to map the LSN number with the time and finally one change table for each CDC enabled table that is used to capture the DML changes on the source table
cdc.dbo_Customer_CT table that contains the actual data before any DML operation is executed and some additional metadata like the operation, affected columns count, etc. The name of the table may vary depending on the name of the primary table on which the CDC is applied, but in general, it will be "NameOfSchema_TableName_CT" hence the name "dbo_Customer_CT".
With the tables, two SQL Agent Jobs are also created for given below
cdc.CDC_TEST_capture job is responsible to push the DML changes into change tables
cdc.CDC_TEST_cleanup job is responsible to clean up the records from the change tables. This job is created automatically by SQL Server to minimize the number of records in the change tables, failing this job execution will be resulting in a larger change table.
Detect Changes
So now that we have implemented CDC on the database and table, let's perform some DML operations given below
INSERT INTO [dbo].[Customer]
([CustName]
,[CustMobNo]
,[Address]
,[SubAreaId])
VALUES
('test cdc'
,'9876543215'
,'Home Address'
,1)
UPDATE [dbo].[Customer]
SET
CustName = 'test cdc 2',
CustMobNo = '9876543216',
[Address] = 'Address updated',
SubAreaId = 2
WHERE CustId = 1
DELETE [dbo].[Customer] WHERE CustId = 1
The results of the executed DML queries are populated in the table [cdc].[dbo_Customer_CT] table as shown in the image below.
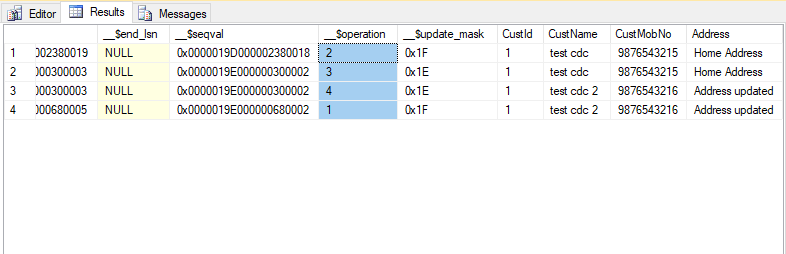
The first five columns are metadata to the rows updated. The column '__$operation' is of significance as the column is used to identify the DML operation.
__$operation = 1 denotes deleted rows
__$operation = 2 denotes new inserted rows
__$operation = 3 denotes row before the updation
__$operation = 4 denotes row after the updation
But quering the cdc table is not advisable by Microsoft, hence we have to use table valued functions that were created while enabling CDC on the table. In this case, we have a table valued function called "fn_cdc_get_all_changes_dbo_Customer" which can be used as given below
DECLARE @from_lsn binary (10), @to_lsn binary (10)
SET @from_lsn = sys.fn_cdc_get_min_lsn('dbo_Customer') -- scheme name with table
SET @to_lsn = sys.fn_cdc_get_max_lsn()
SELECT *
FROM cdc.[fn_cdc_get_all_changes_dbo_Customer](@from_lsn, @to_lsn, 'all')
ORDER BY __$seqval
Disable CDC
Once the CDC is enabled we cannot change the Primary Key of the table, truncate the table, and in case we have to add or remove a column the corresponding CD table doesn't get updated and hence won't detect any changes for the newly added column. In these cases, we will have to disable the CDC make appropriate changes and re-enable CDC on the table. Below is a stored procedure that can be used to remove CDC on a table.
EXEC sys.sp_cdc_disable_table
@source_schema = 'dbo' ,
@source_name = 'Customer',
@capture_instance ='all'
Note
- The SQL Agent should be up and running all the time
- cdc_jobs configurations are very important to set correctly.Overestimating/underestimating the configurations will have a detrimental impact on you application performance. You may need to genuinely configure as per your workload, a performance test can be carried out as per your workload to reach out your optimal values
- Cleanup job is scheduled by default to run at 02:00 AM every day
- Capture job is scheduled as “Start automatically when SQL Server Agent starts”. As it uses continuous parameter further, you may not need to make any change for “Schedule type”.
HostForLIFEASP.NET SQL Server Hosting

March 8, 2021 06:41 by
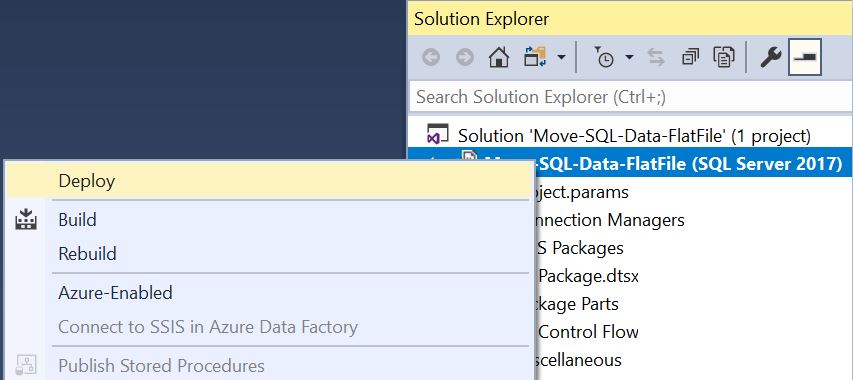
PeterBefore going next, first make sure you have SQL Server Integration Services installed. Open Visual Studio SSIS package project and right click on project and hit Deploy to deploy all packages, if you want to install individual packages then right click on the package and hit deploy.
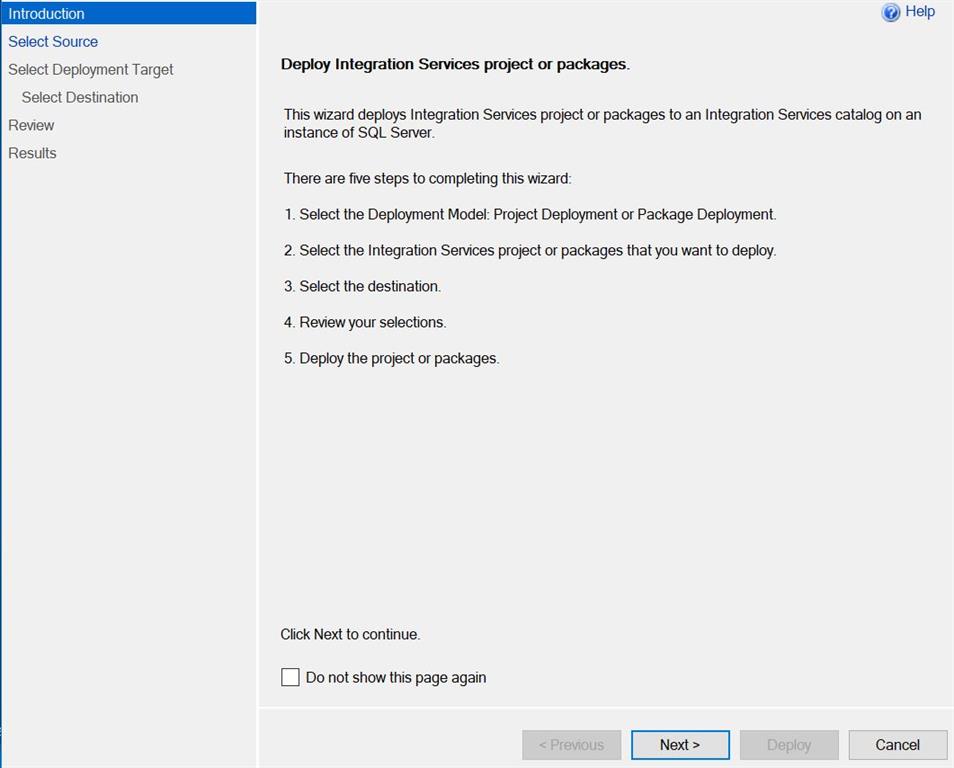
First window is introduction windows click Next button.
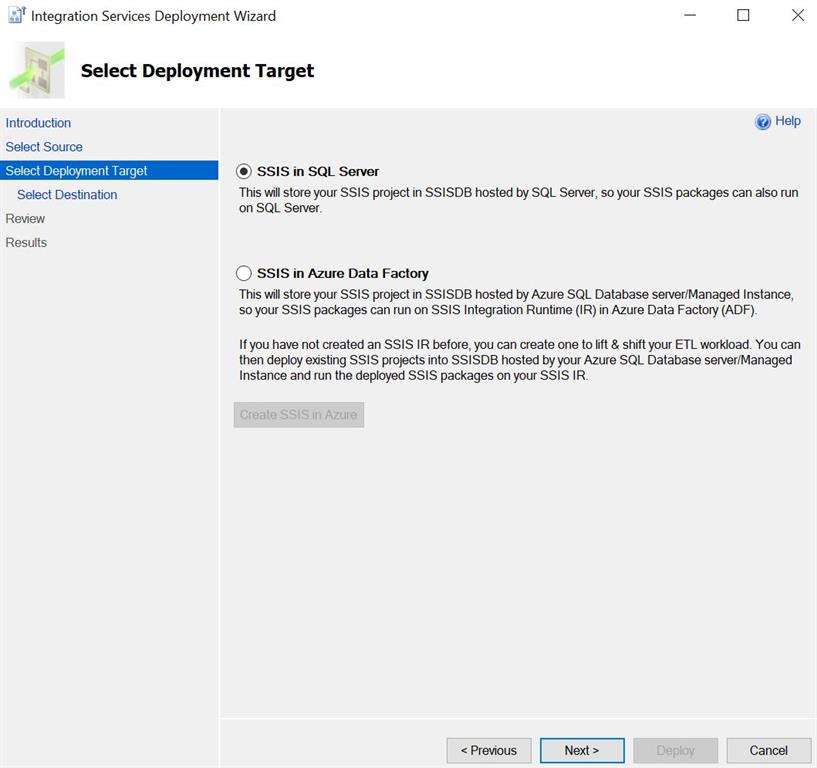
We have two deployment targets,
SSIS in SQL Server
SSIS in Azure Data Factory
As in this article we are going to deploy on SQL Server, so we must select SSIS in SQL Server and click Next.
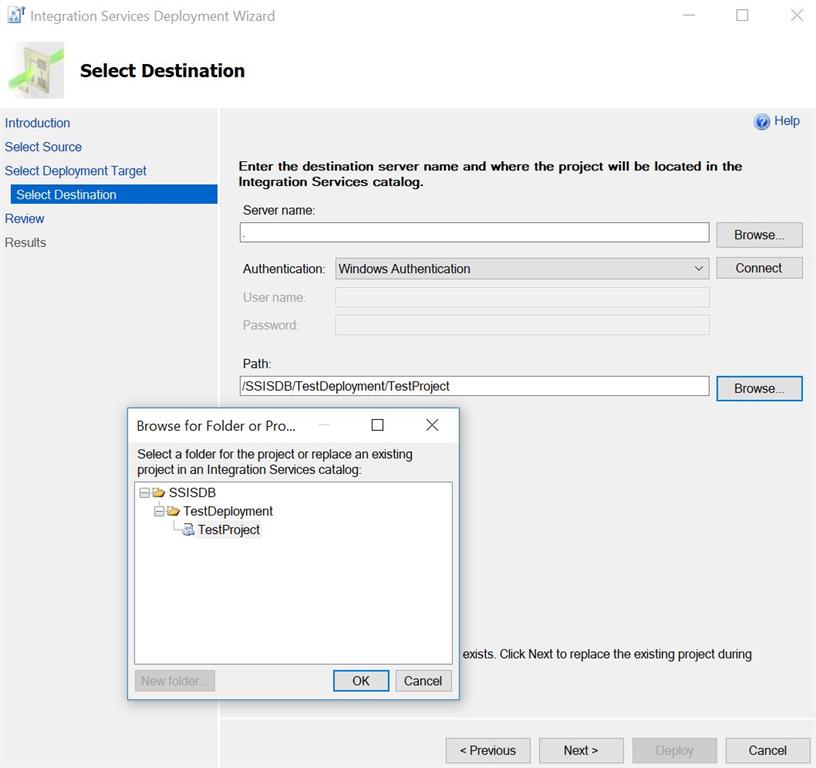
Select destination, Enter SQL Server name, Authentication type, Username and password and click Connect. Once connect Browse project folder path if available, if not available create a directory in SSISDB and create a new project and hit Next.
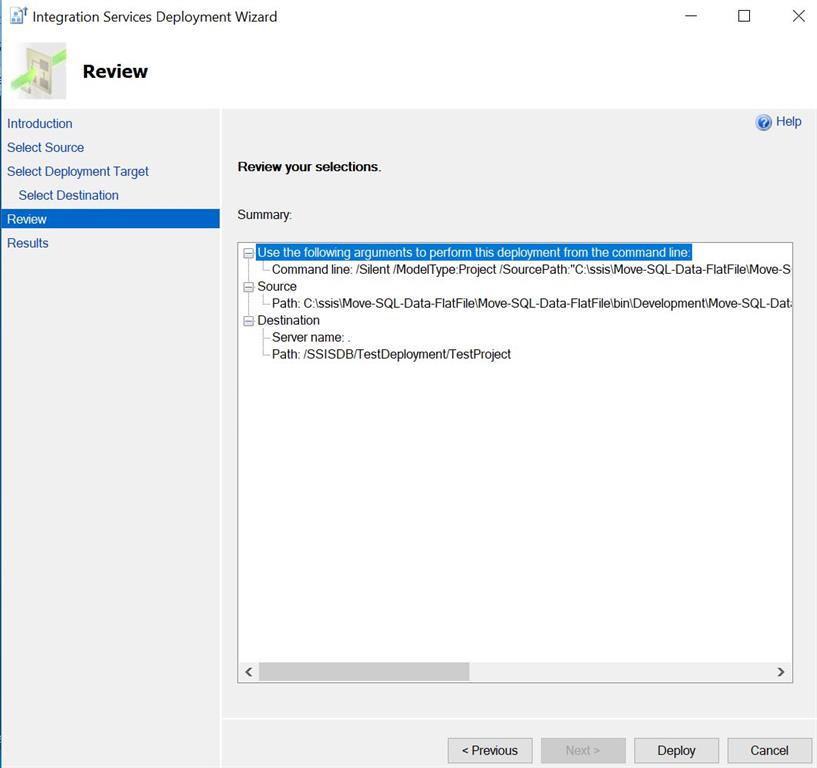
You can review all given changes and hit Deploy.
You can check the deployment result in last windows. If all results are passed, then click close.
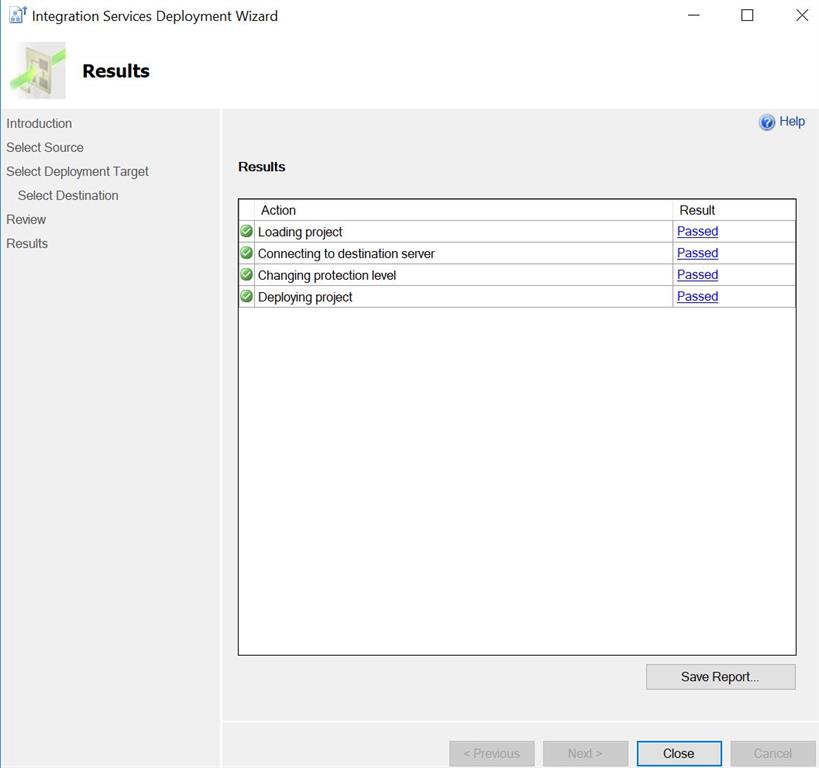
Above screenshot shows that all results are passed and successfully deployed.
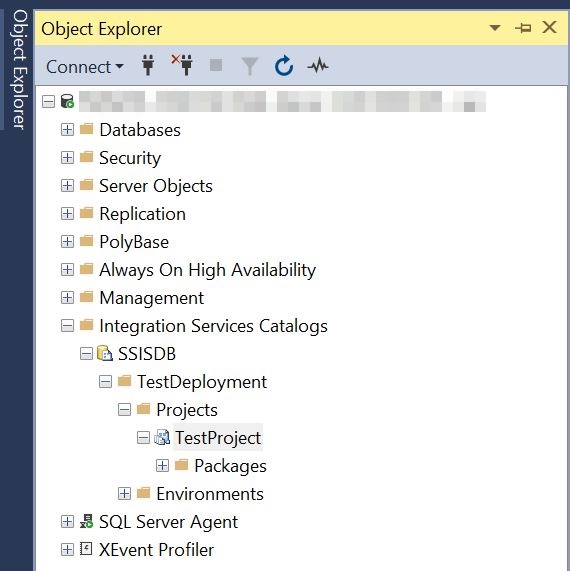
Go to SQL Server and expand Integration Services Catalogs and go to SSISDB the you can see the created folder and project and deployed packages there.
HostForLIFEASP.NET SQL Server Hosting