In this article, I will guide you in how to take SQL Server Database backup to a local folder. There are two ways to take a database backup.
Method 1
Open SQL Server Management Studio (SSMS) and follow the below steps
Select the Database that you want to take backup.
For example, here I am using the EmployeeDB database.
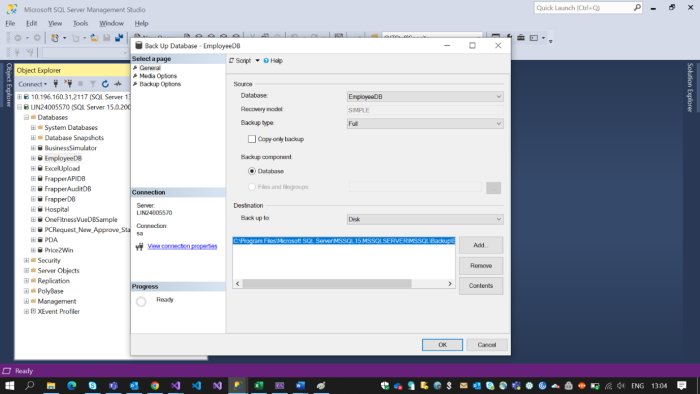
Select Database. Right click on database -> select Task -> Back Up.

Once we click on Back up, a pop-up window will open.
This window will show the Database name from which we are taking a backup. Select the backup type as Full, and back up to Disk.
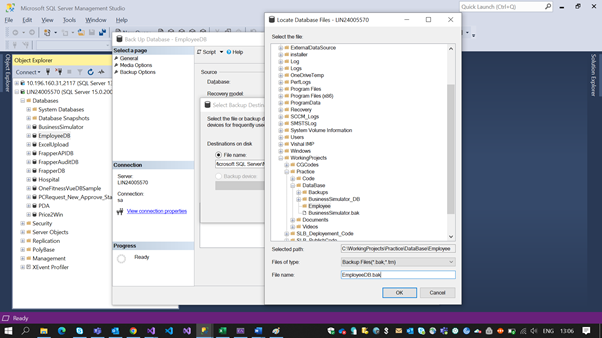
Now click on the remove button and then click on Add. This will open one more popup window, which will allow us to choose our specific path. Now once we navigate to our path, we need to provide the database file name. In my case, I have given EmployeeDB.bak. and click on OK.
Note: ".bak" is an extension for backup.
Once we click Ok, our backup path will be set. Now click Ok.
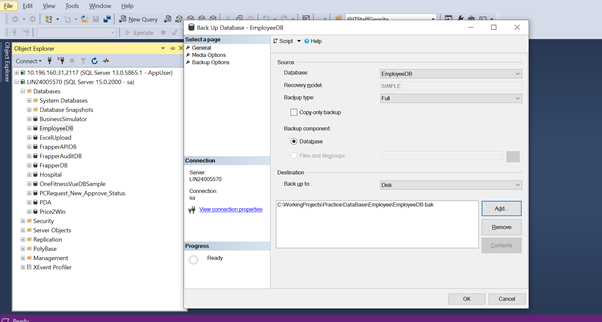
Once we click on OK our database backup will be created to our provided path.
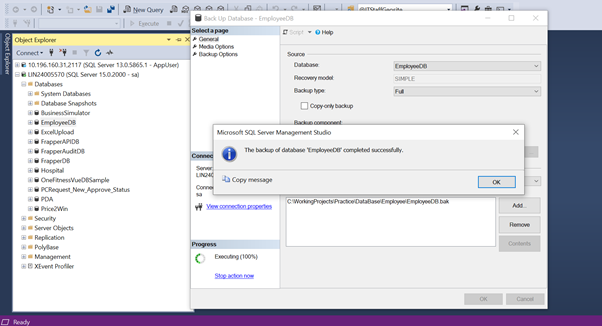
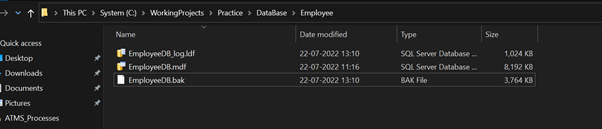
Now we can verify whether our database backup is created or not.
Method 2
Using SQL Query.
declare @backuppath as nvarchar(max)
set @backuppath = N'C:\WorkingProjects\Practice\DataBase\Employee\EmployeeDB_'
+ CONVERT(nvarchar,YEAR(getdate()))
+ CONVERT(nvarchar,Month(getdate())) +
+ CONVERT(nvarchar,DAY(getdate())) + '.bak'
Backup Database [EmployeeDB] to DISK = @backuppath WITH NOFORMAT, NOINIT, NAME=N'EmployeeDB-Full Database Backup', SKIP, NOREWIND, NOUNLOAD, STATS = 10
GO
Now execute the query
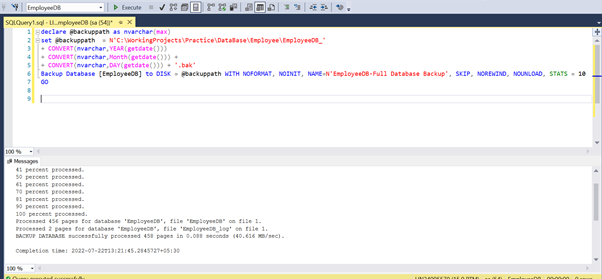
Once the query is executed, it will create a database backup to the specified path.
Eg. In my case path is "C:\WorkingProjects\Practice\DataBase\Employee".
Now, we can verify whether our database backup is created or not.

HostForLIFEASP.NET SQL Server 2019 Hosting
