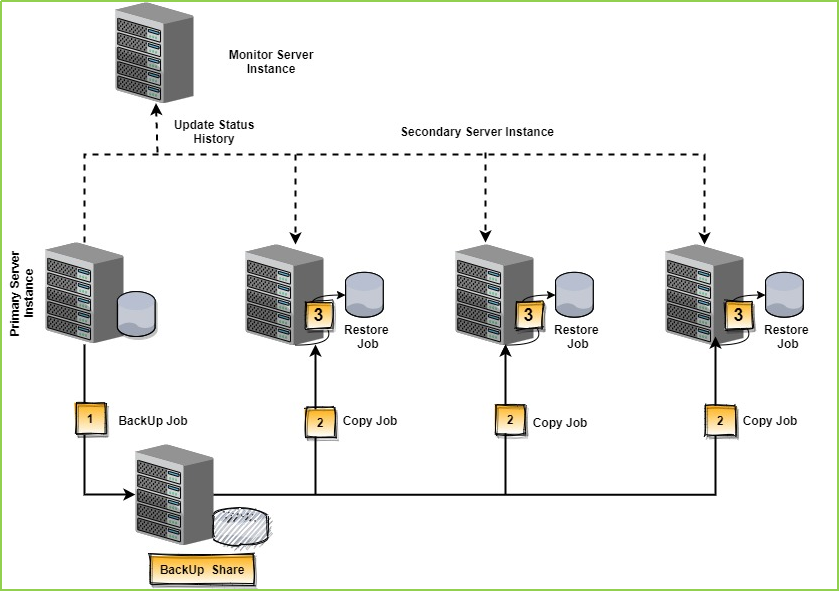
SQL Server Log Shipping is one of the basic levels of SQL Server High-Availability (HA) features. It is an automated system/way to keep backup & restore your database from one server/instance to another or more server/instances. The primary purpose of log shipping is to increase database availability by maintaining a backup server that can replace a production server quickly.
Limitation of Log Shipping
- SQL Server Log Shipping is one of the basic level of SQL Server High-Availability (HA) features.
- Here is the possibility of data loss in log shipping for a set of times you’ve set for log shipment to the primary server to the secondary server(s) when the primary server fails on a disaster.
- Failover does not work for log shipping.
- SQL Server Express edition does not support log shipping.
Benefits of Log Shipping
- Easy setup and maintenance.
- Provides both Disaster Recovery and High Availability solutions.
- Low maintenance.
- Multiple standby servers can be configured.
- Standby databases can be available for read-only queries
- From SQL Server 2008 Log Shipping technology is available in all later SQL Server Version except express edition.
- Log Shipping allows the auto-update of the schema(table, views, etc.) on a secondary server.
- Let’s see how the log shipping technology works in the following diagram.
Development/Tested Environment Details
| SL |
Item Name |
Details |
| 01 |
Primary Server (OS) |
Windows 10 Pro, 64 bit |
| 02 |
Secondary Server (OS) |
Windows 10 Pro, 64 bit |
| 03 |
SQL Server in Primary Server |
Microsoft SQL Server 2016, Enterprise Edition (64-bit) |
| 04 |
SQL Server in Secondary Server |
Microsoft SQL Server 2016, Developer Edition (64-bit) |
Note
Though, Here we’ve used different editions of SQL Server (Enterprise & Developer) but it is good practice to keep the same version & same edition of SQL Server in both/all server(s).
Configure SQL Server Log Shipping(Without active directory)
Follow the steps one by one to configure SQL Server Log Shipping(Without active directory).
Step 1
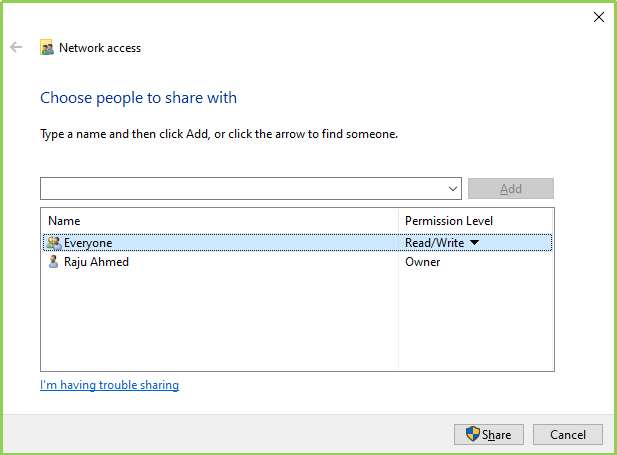
Create a folder on your Primary Server. Then go to Properties > Sharing Tab > Click On Share > Select Everyone > Click On Add > Give it Read/Write Permission > finally click on Share.
Step 2
Do the same thing on your Secondary Server as in Step 1.
Step 3
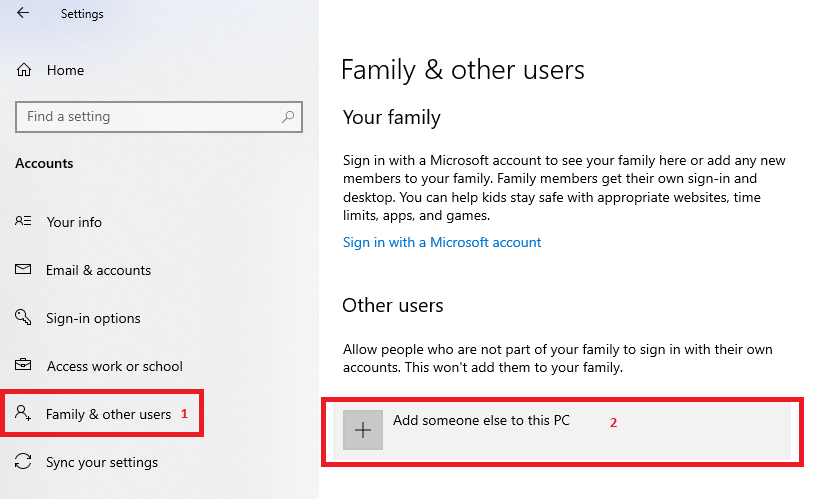
As we’re going to setup Log Shipping without using Active Directory (AD), To do that we need to create a user with the same name and password in both servers (Primary & Secondary), so that we can use them for SQL Server Service & SQL Server Agent Service read/write permission. First create a new user on your Primary Server.
To create a new User go to Start > Settings > Accounts
The following screen will appear. Then follow the following steps
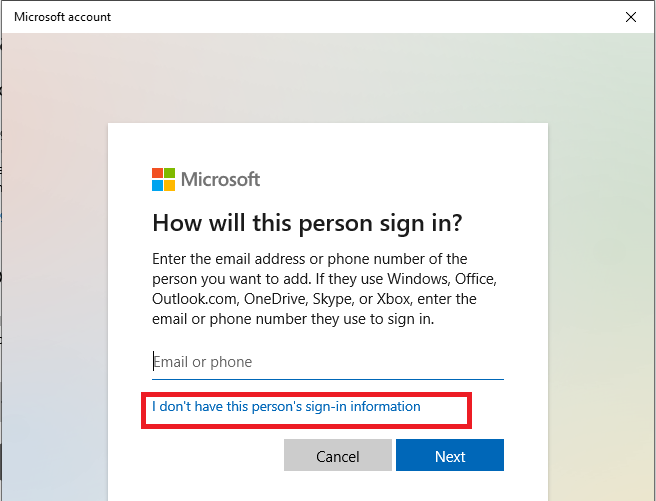
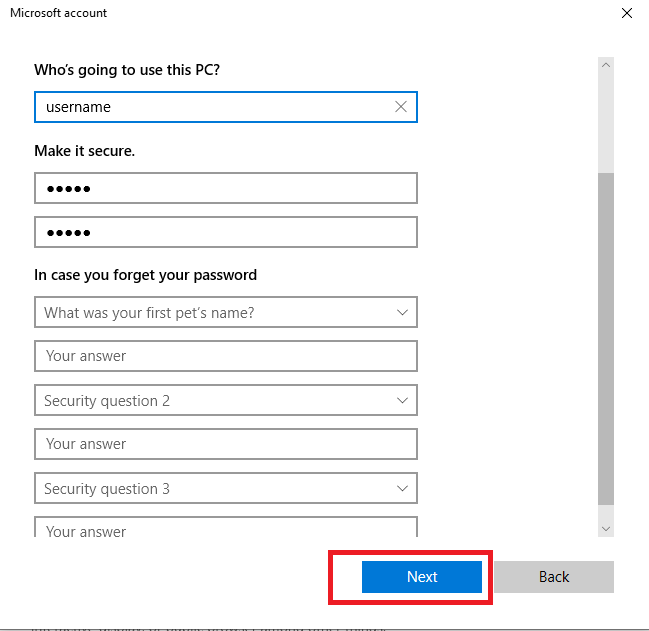
Now we’ll create a user without a Microsoft account.
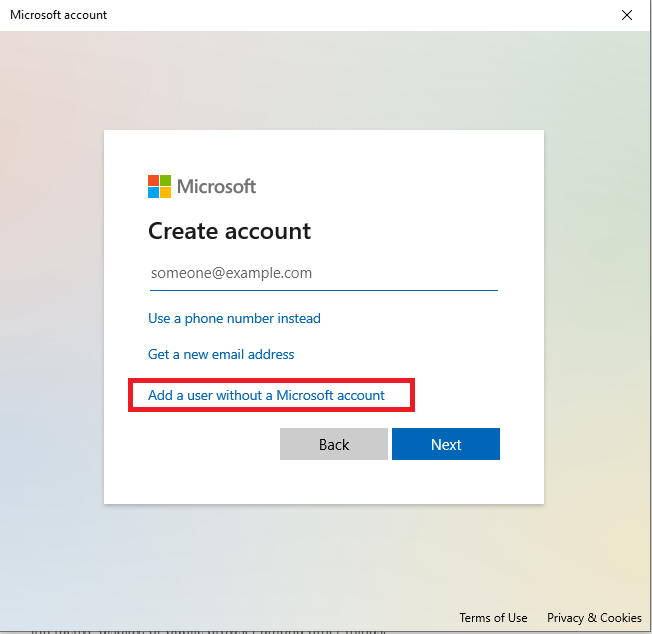
Provide the required field and click on Next Button. Hope User will be created.
Step 4
Do the same thing on your Secondary Server as in Step 3.
Note: Keep the user name & password the same as Primary Server you’ve saved.
Step 5
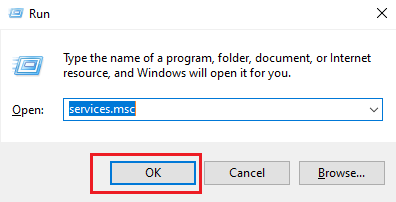
Now we’ll give MSSQLSERVER / SQL Server(Version) and SQL Server Agent (Version) permission/log on with our recently created user in both (primary & secondary) servers. For doing that follow the following steps. Go to Run (Windows Key + R) and Type services.msc as like the following image.
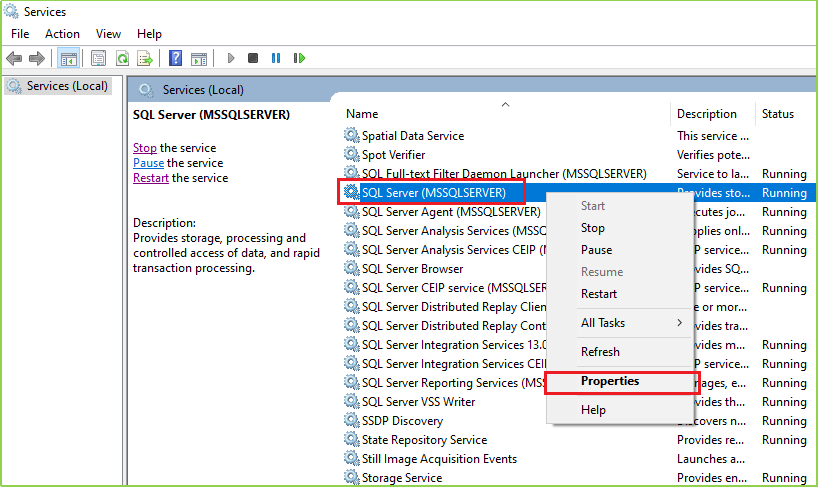
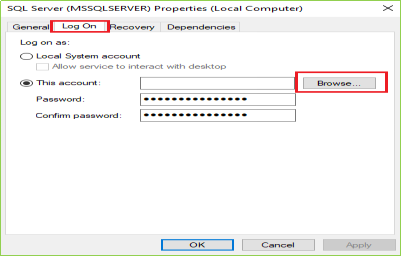
Then following window/screen will be arrived. Then Select SQL Server(MSSQLSERVER) > Right-click on that > Click On Properties as following image.
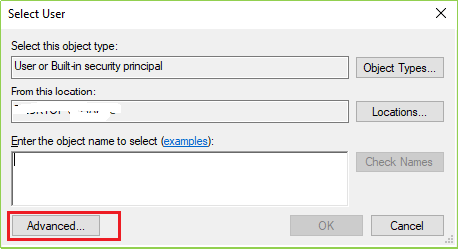
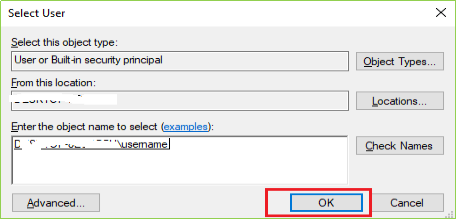
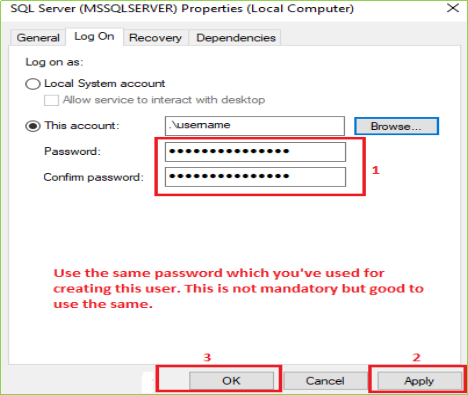
When you click on Properties following screen will come up on your screen. Click on Log On tab & then click on the Browse as per the following image(s).
Step 6
Do the same thing on your Primary Server for SQL Server Agent as in Step 5.
Step 7
Do the same thing on your Secondary Server as Step 5 & Step 6.
Note: Keep the user name & password the same for SQL Server service log on as Primary Server you’ve saved. And also make sure MSSQLSERVER & SQL Server Agent Service is running on your both server. For confirmation, you may restart these services in primary
Step 8
We’re almost done with all other environment settings except SQL Server. Now log on your primary server(SQL Server) with a user(Like: user = ***** , Password= *****).
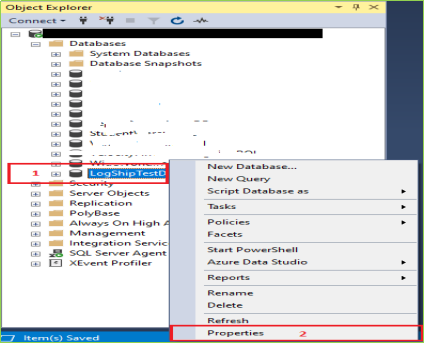
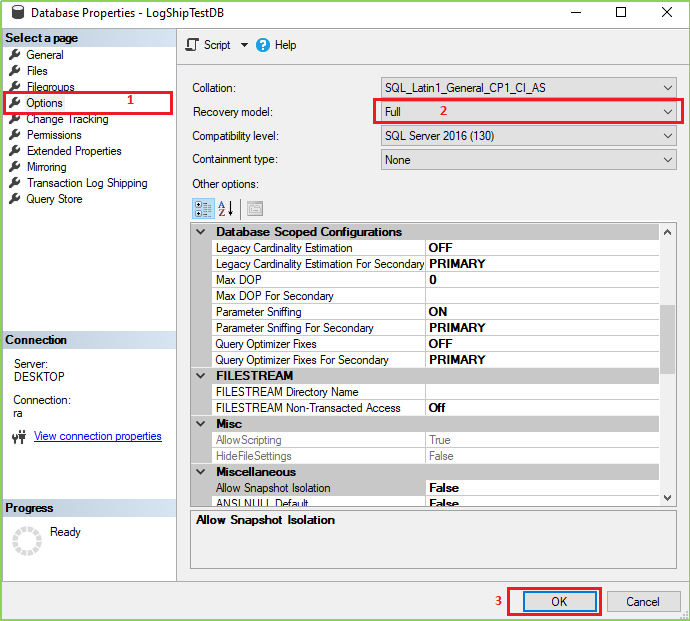
Note: Your login user must have the sysadmin role. Right Click on your desired Database and click on Properties.
Step 9
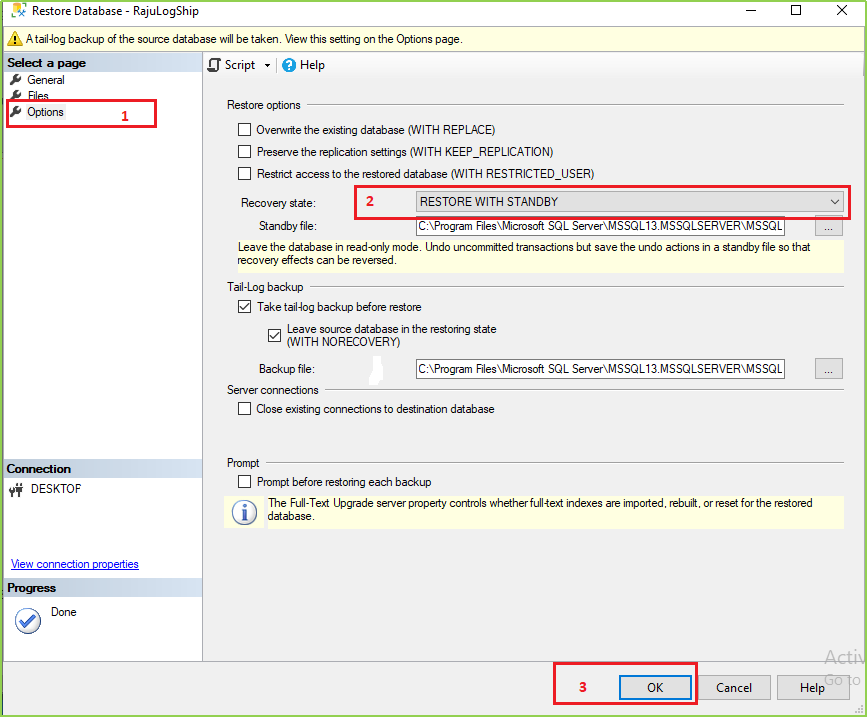
Now take a full backup of that database. And take the backup file to the secondary server & restore it as the following image. Here I’m not showing the full backup process but after selecting the database (.bak) file, you’ve to go Option > Then select “RESTORE WITH NORECOVERY”.
Step 10
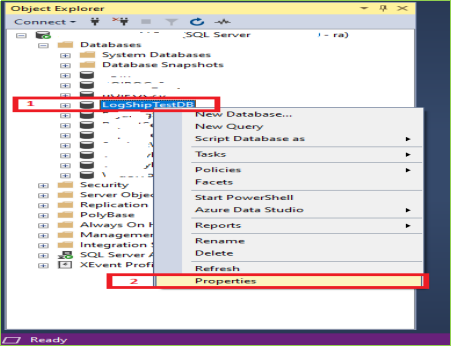
Now we’ll create the main things/configurations for our desired log shipping. Go to the primary server and select your database. Now follow these following images one by one.
After clicking on Properties following screen will be open. Now follow the marked serial.
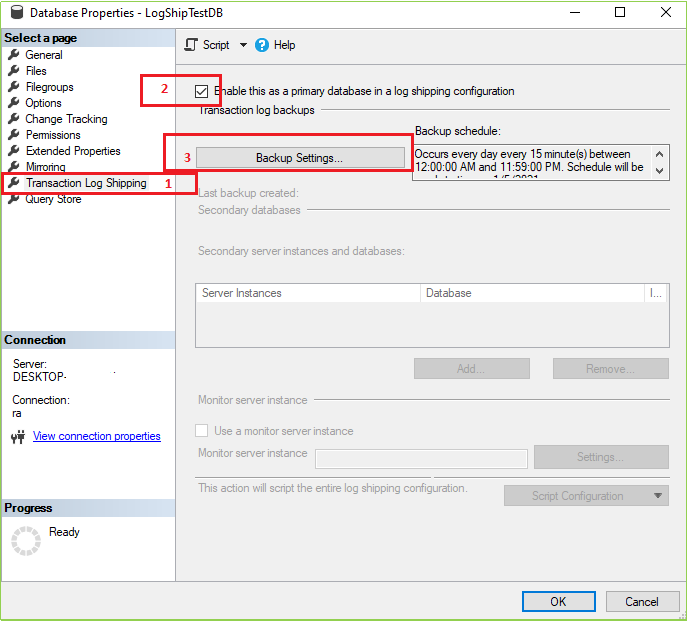
After Clicking on Backup Settings following screen will appear. Now follow the marked step one by one as a mentioned serial.
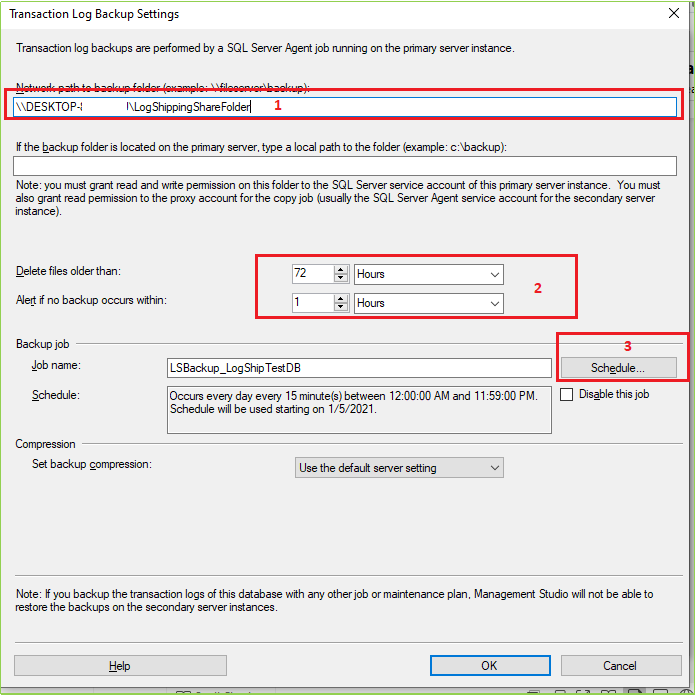
When you click on the Schedule button following screen will appear. Here you can set up the necessary configuration(s). Here we’ll change only the marked field value.
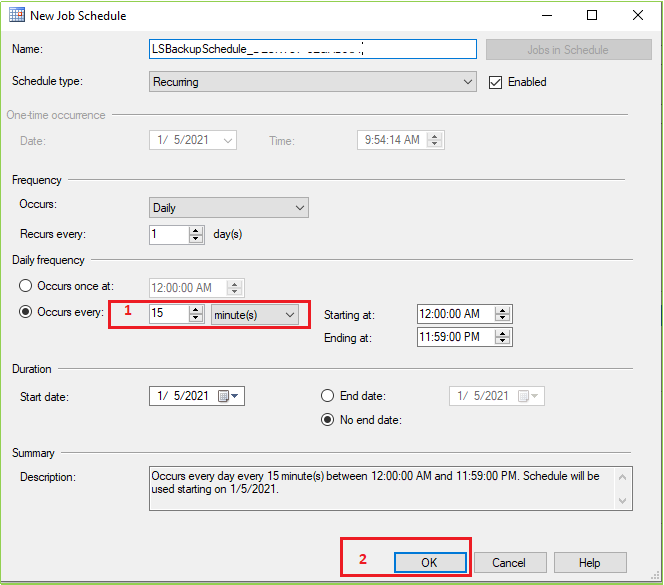
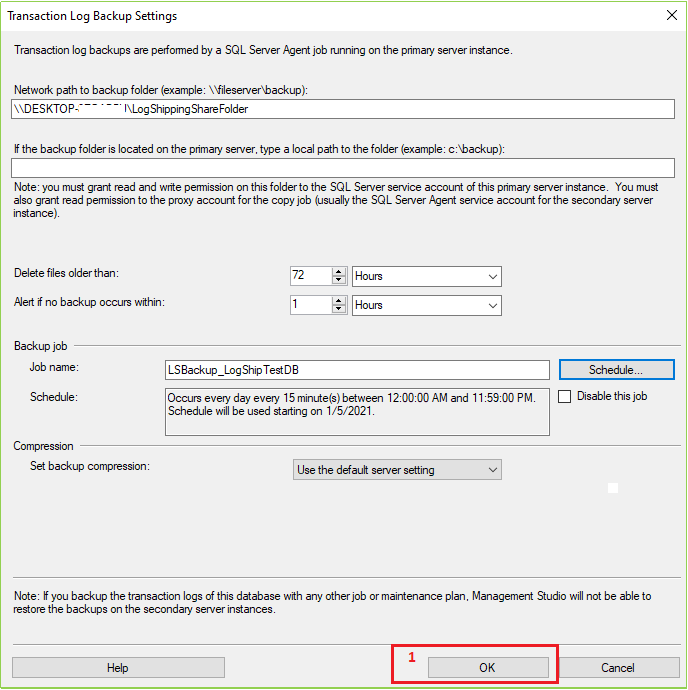
After setting(s) all changes/configurations click OK. Then the following screen will appear. Now click OK.
After clicking on OK from the previous screen the following screen will open. Now Click On Add as marked in the following screen.
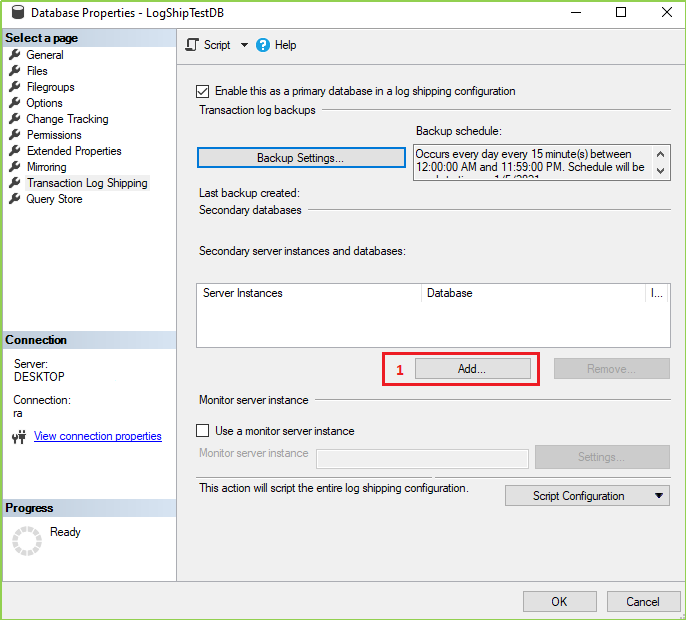
When you click on Add in the previous screen then the following screen will be come-up. Now it’s time to connect with your secondary server(s)/instance(s). Now follow the marked steps & provide the necessary data.
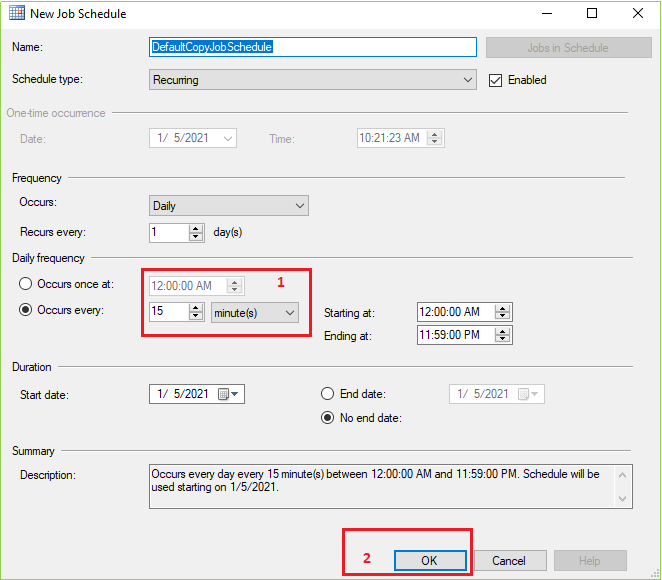
In the following image first tab, we’ll just work on the database restore/initialing process on our secondary server. You know, we’ve already restored our database in our secondary server at Step 9. So we’ll select “No, the secondary database is initialized.” Option and click OK. Now go to the second tab named “Copy Files”, put your secondary server shared folder network path, And click on the Schedule… button
After clicking on the Schedule… from the Copy Files tab following screen will appear. Change the marked field value as your requirement and leave others as usual if it is not necessary for you. Then click OK.

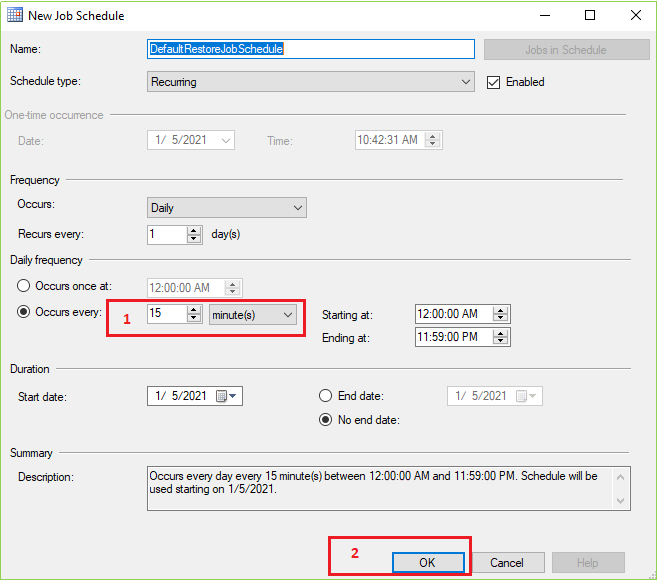
Now click on the Restore Transaction Log tab Select Standby Mode > Check on “Disconnect users in the database when restoring backups” > Put your delay restoring time (It is optional) > click on Schedule… button
After clicking on Schedule… from the Restore Transaction Log tab following screen will appear. Change the marked field value as your requirement and leave others as usual if it is not necessary for you. Then click OK.
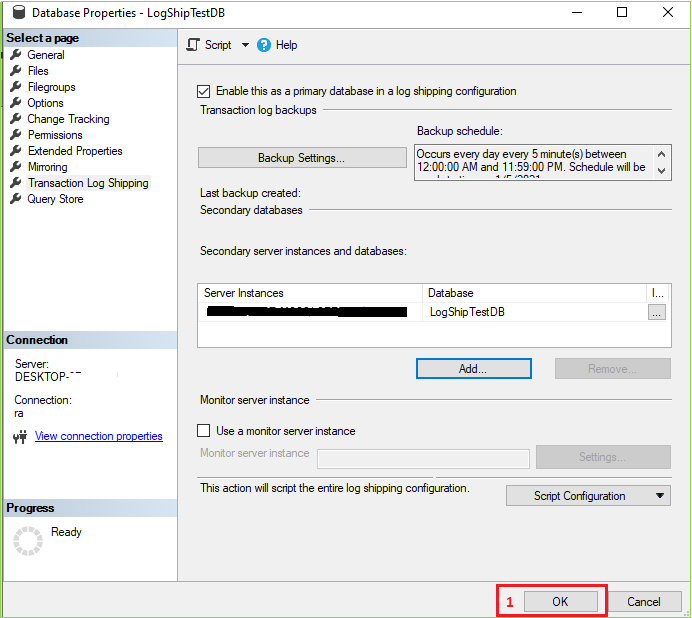
After clicking on OK from the previous screen following image will be open. Our secondary server instance was successfully added. Now click on OK from the following image.
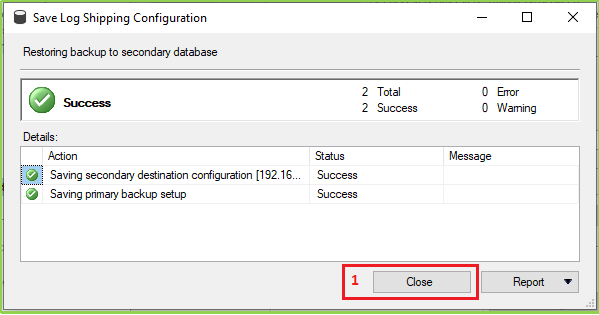
We’ve done all settings & configurations for our desired log shipping feature. When clicking OK from the previous screen then the following screen will open. If you’ve everything as our document, we hope you’ll be able to see the following screen with success a message. Click On the Close button.
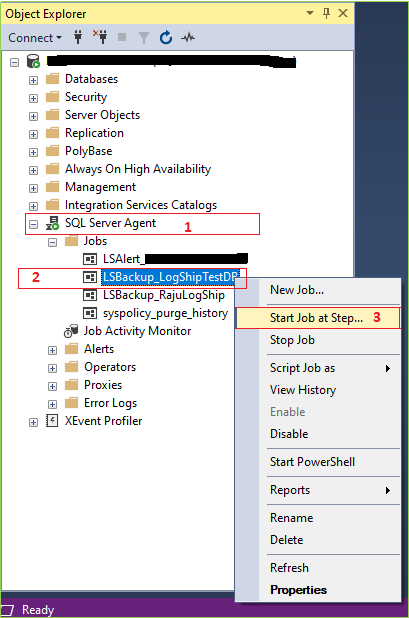
Step 11
Congratulations, you’ve successfully configured log shipping. Now we’ll manually test, does our log shipping is working or not as our expectation. For manual testing first go to your Primary Server > Expand SQL Server Agent > Right-click on your Log Ship Backup Job > Click on Start Job at Step.
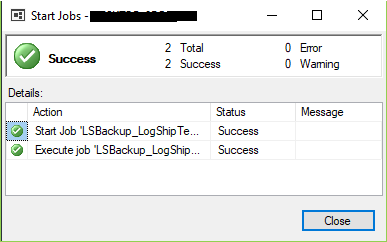
If everything is fine you’ll get a success message like the bellow image.
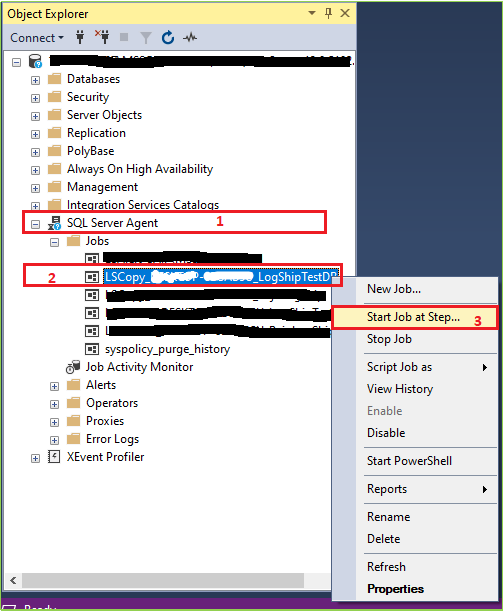
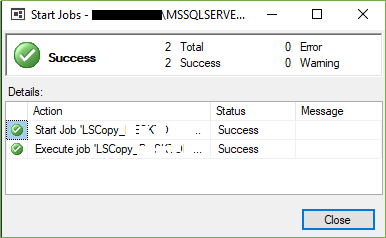
Now go to your secondary server. > Expand SQL Server Agent > Right-click on your Log Ship Copy Job > Click on Start Job at Step..
If everything is fine you’ll get a success message like the bellow image.
Tips: For testing data update, you may insert some data on your primary database and then you may follow the step (Step-11) for manual testing.
HostForLIFEASP.NET SQL Server 2019 Hosting
