In this article, we will see how we can compare the comma-separated values with existing values stored in the table. Values can be in a different order from the user or table. We have to first order it both sides and then compare them.
Create a Table and Insert the Data
Here I create a table with only one column which contains values with commas. And insert 4 values as of now.
CREATE TABLE COMMA_SEPERATE_VALUES
(
ITEM VARCHAR(500) NOT NULL
)
INSERT INTO COMMA_SEPERATE_VALUES VALUES
('123,456,789'),
('ABC,XYZ,PQR'),
('321,654,987'),
('ZXY,BCA,QRP')
But before starting the Query for comparing values, we must clarify the following concepts.
String_split Function
The STRING_SPLIT() function is a table-valued function that splits a string into a table that consists of rows of substrings based on a specified separator.
Syntax
STRING_SPLIT ( input_string , separator )
input_string is a string in which we want to perform the operation. The input string must be varchar,nvarchar, nchar, or char.
Separator is a single character value using which we want to split the string.
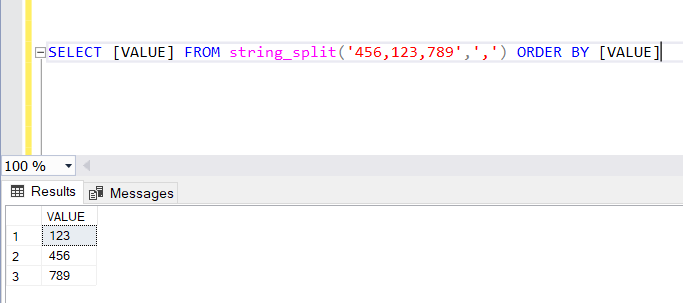
SELECT [VALUE] FROM string_split('456,123,789',',') ORDER BY [VALUE]
When we execute the above Query, it will return a table with values in ascending order, as shown below.
FOR XML PATH
In SQL Server, the FOR XML clause allows us to return the results of a query as an XML document. Simply placing the FOR XML clause at the end of the Query will output the results in XML.
But more importantly, it will return data in a single row no matter if you have n numbers of the data row.
SELECT [VALUE] FROM string_split('456,123,789',',') ORDER BY [VALUE] ASC FOR XML PATH
Executing the above Query will return output as shown in the image below.
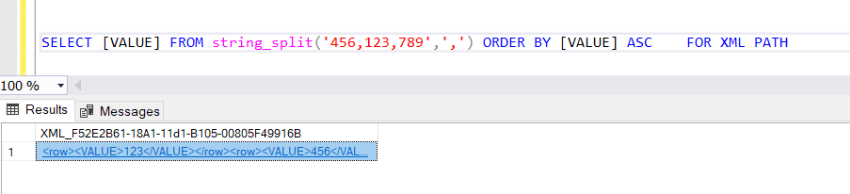
As you can see in the above image, the output has the main row element and then the element of the column name. But for this use case, we don’t need that. We can also rename the row root tag name by specifying the name after the path.
SELECT [VALUE] FROM string_split('456,123,789',',') ORDER BY [VALUE] ASC FOR XML PATH('')
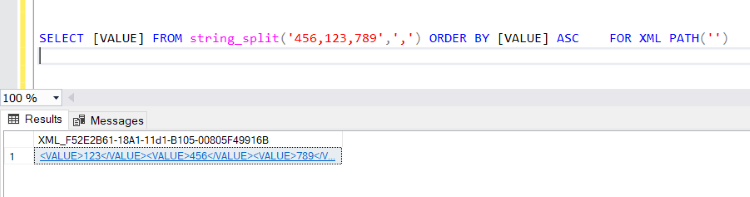
The above Query will return output as shown in the below image, but still, it comes with a column name as an element, but we don’t need that. We need values with commas. To get this type of output, we can use the below Query.
SELECT ','+[VALUE] FROM string_split('456,123,789',',') ORDER BY [VALUE] ASC FOR XML PATH('')
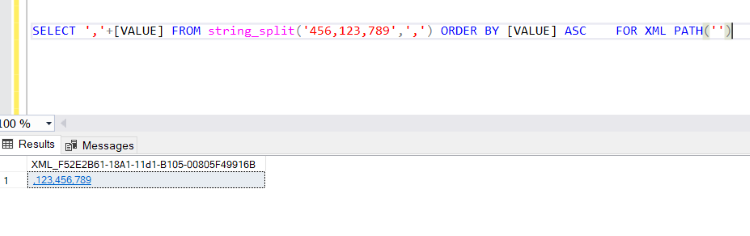
In the above Query, we are Concating column value after the comma and not specifying any column name. So it will not generate any tag for this column, and we will get the output as shown below.
STUFF Function
The STUFF() function deletes a part of a string and then inserts another part into the string, starting at a specified position.
Syntax
STUFF(string, startIndex, length, new_string)
string: The string to be modified
startIndex: The position in the string to start to delete some characters
length: The number of characters to delete from the string
new_string: The new string to insert into the string at the start position
SELECT STUFF('PETER',1,6,'SCOTT')
In the above Query, it will start replacing from 1st index to 6 characters. So as you can see below the image, it will replace PETER with SCOTT.
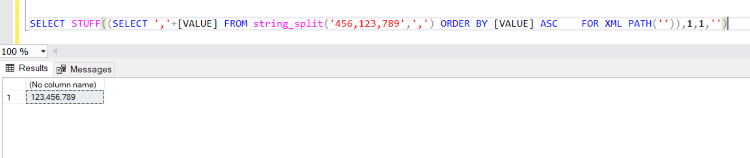
SELECT STUFF((SELECT ','+[VALUE] FROM string_split('456,123,789',',') ORDER BY [VALUE] ASC FOR XML PATH('')),1,1,'')
The above Query will return a string by removing the first comma from the string so we can use it in our comparison.
Compare Comma Separate String With Table
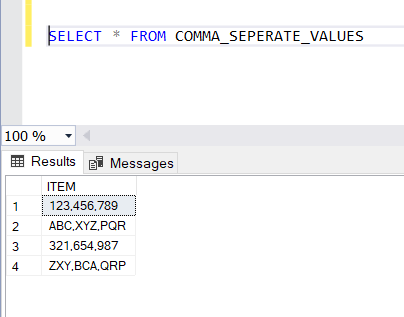
In our table, there are 4 records, as you can see in the below image.
SELECT * FROM COMMA_SEPERATE_VALUES
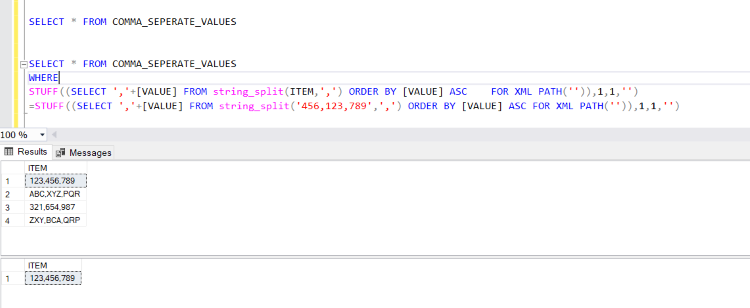
Now we want to check if any record contains these 456,123,789 Values.
SELECT * FROM COMMA_SEPERATE_VALUES
WHERE
STUFF((SELECT ','+[VALUE] FROM string_split(ITEM,',') ORDER BY [VALUE] ASC FOR XML PATH('')),1,1,'')
=STUFF((SELECT ','+[VALUE] FROM string_split('456,123,789',',') ORDER BY [VALUE] ASC FOR XML PATH('')),1,1,'')
In the above Query, we check both sides of the string by equal to the operator.
In the where clause, we used the same functions discussed above.
The left-hand side value comes from the table, and the right side comes from the user’s input.
As you can see in the below image, it will return output with the matched record.
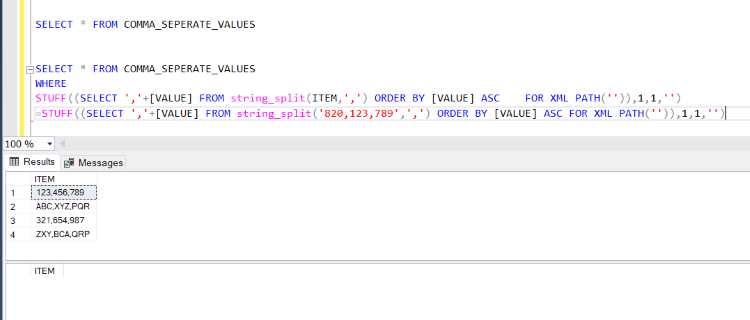
SELECT * FROM COMMA_SEPERATE_VALUES
WHERE
STUFF((SELECT ','+[VALUE] FROM string_split(ITEM,',') ORDER BY [VALUE] ASC FOR XML PATH('')),1,1,'')
=STUFF((SELECT ','+[VALUE] FROM string_split('820,123,789',',') ORDER BY [VALUE] ASC FOR XML PATH('')),1,1,'')
We don’t have any record with 820,123,789 value, so it will not return any record from the table.
I hope you find this article helpful. If you have any doubts, you can ask in the comments below.